The boys wanted to see if they could pick up some basic skills around repairs
they would be able to do when they get their first affordable car. Dave
volunteered take on the challenge. He's had many years as a Mechanic and even
did call in radio shows on how to tackle car problems. We stated out with
something the comes up regularly and is not too challenging, a brake job.
Daniel Burndorfer provided the
vehicle that needed the brake job and Dave
picked up the parts for us using his connections. He got the "Auto Value" store down here on Heritage and Bonaventure to give us a great deal
. It's his favorite parts store.
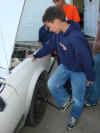 |
 Applying the mechanical advantage
 |
 Daniel has a bit more body weight to apply.
 |
 Make sure the jack pushes up on the frame. Put blocks behind back wheels.
 |
 |
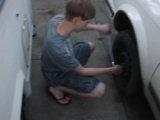 |
 Put up the tripods on each side on the frame.
 |
 All safe and ready to take apart.
 |
 So, check for hose cracks, calipers slide along pins freely, Nipple not seized
in place, rotor not too thin or warped. Now we need to spread calipers to
allow new fatter pads in. Make sure nipple is open as you pry apart to
allow dirty brake fluid out, not back up to the master cylinder.
This will mess up the ABS system if you have one.
 |
 It's the resin in the pad that causes the glaze (produced by heat). The
glaze is what provides the friction.
 |
 The old one definitely feels like more friction.
 |
 So that's applying 100 foot pound! Applying 100 pounds 1 foot out from the
bolt.
 |
 Torque on those lug nuts. Oh and make sure the pretty end goes against the
rim!
 |
 Just checking the job.
 |
So
we aborted this effort as the calipers were not sliding along pins any
more. Caused by excessive heat. Without this movement once the brakes are
applied and then released only one side releases. This causes excessive
ware on the pad on that side. So brake lesson will resume in 2 weeks with
new calipers to install as well. |
Note
on bleeding the brakes. Once we ejected to dirty fluid by prying
apart the pads, we now had to get them bled to get them working again.
This was done by having someone press the brakes but only half way down,
not all the way to the floor. This is important as you can damage the
master cylinder rubbers if the fluid is low. |
 So there are Left and right pads for the outside. Who would have guessed.
The squeaker tabs give it away though.
 |
 Divide up the parts and put them with the correct wheel.
 |
 Now drop off the Calipers and disconnect the hose.
 |
|
 |
 |
 |
 Don't forget, there is a copper washer on either side of the hose. New
calipers come with brass washers but they are too hard to seat properly,
so reuse the copper ones.
 |
 Make sure the rotors are marked so they can back on in the right position.
Clean out any chunks as we need to have a flush fit when we bolt it back
on.
 |
 So if you happen to get a small rust chunk etc between the rotor and the
base when you bolt it back on, the rotor will shimmy back and forth
and when you apply the brakes you'll feel the shaking.
 |
 |
 Bolt the calipers back on. Don't forget to take out the protector plastic
from the hole for attaching the hose. Undo the nipple and lubricate with
brake fluid and then screw it back in. This keeps them coated with oil so
they won't rust into calipers.
 |
 Get some brake fluid back in and try a gravity feed bleed job.
 |
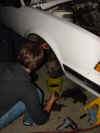
 Open the nipple and wait for the fluid to stat coming out. If it's not
clear let the dirty fluid pass trough as well.
 |
 |
 |
 Just
Just |
 Now just torque those nuts back on and we are done!
 |
Thanks
Dave, you're the best, and thanks Auto Value, appreciate the deal.
Scouts have limited budgets so now we can buy more hotdogs and marshmallows
for the campfire. |
|
|
|
|
|