Woodbadge 2 - Leader Training


Weekend of Sept 16 and Oct 24, 2014
Woodbadge 2 - Leader Training | | |
|
Weekend of Sept 16 and Oct 24, 2014 |
Jeremy and I took this course with a bunch of other scouters down in Magrath Alberta. .
Most to the training involved learning about safety, forms, issues relating to youth: abuse, bullying, handicaps, risk assessments just to mention a few. So not a lot of pictures for these items. For the ones involving skills we got pictures.
| Jeremy Olsen, Karl Burndorfer - Calgary South Scout Leaders | |
| My Team (the Mountaineers: Rhett Manden, Derrick Beck, Foster Heninger, Brad Coon) | |
| So many trainers I didn't have room for them all |
| Map to Training Campground |
 Derrick working on our "under budget" breakfast. Omelet burrito,
great taste, limited cleanup.
Derrick working on our "under budget" breakfast. Omelet burrito,
great taste, limited cleanup. |
 Some minor cleanup and the breakfast in the dark was done. These guys
start the training day early man.
Some minor cleanup and the breakfast in the dark was done. These guys
start the training day early man. |
||
 Rhett and Brad taking it all in after that filling breakfast.
 |
 Foster and Derrick discussing the previous nights skit.
 |
||
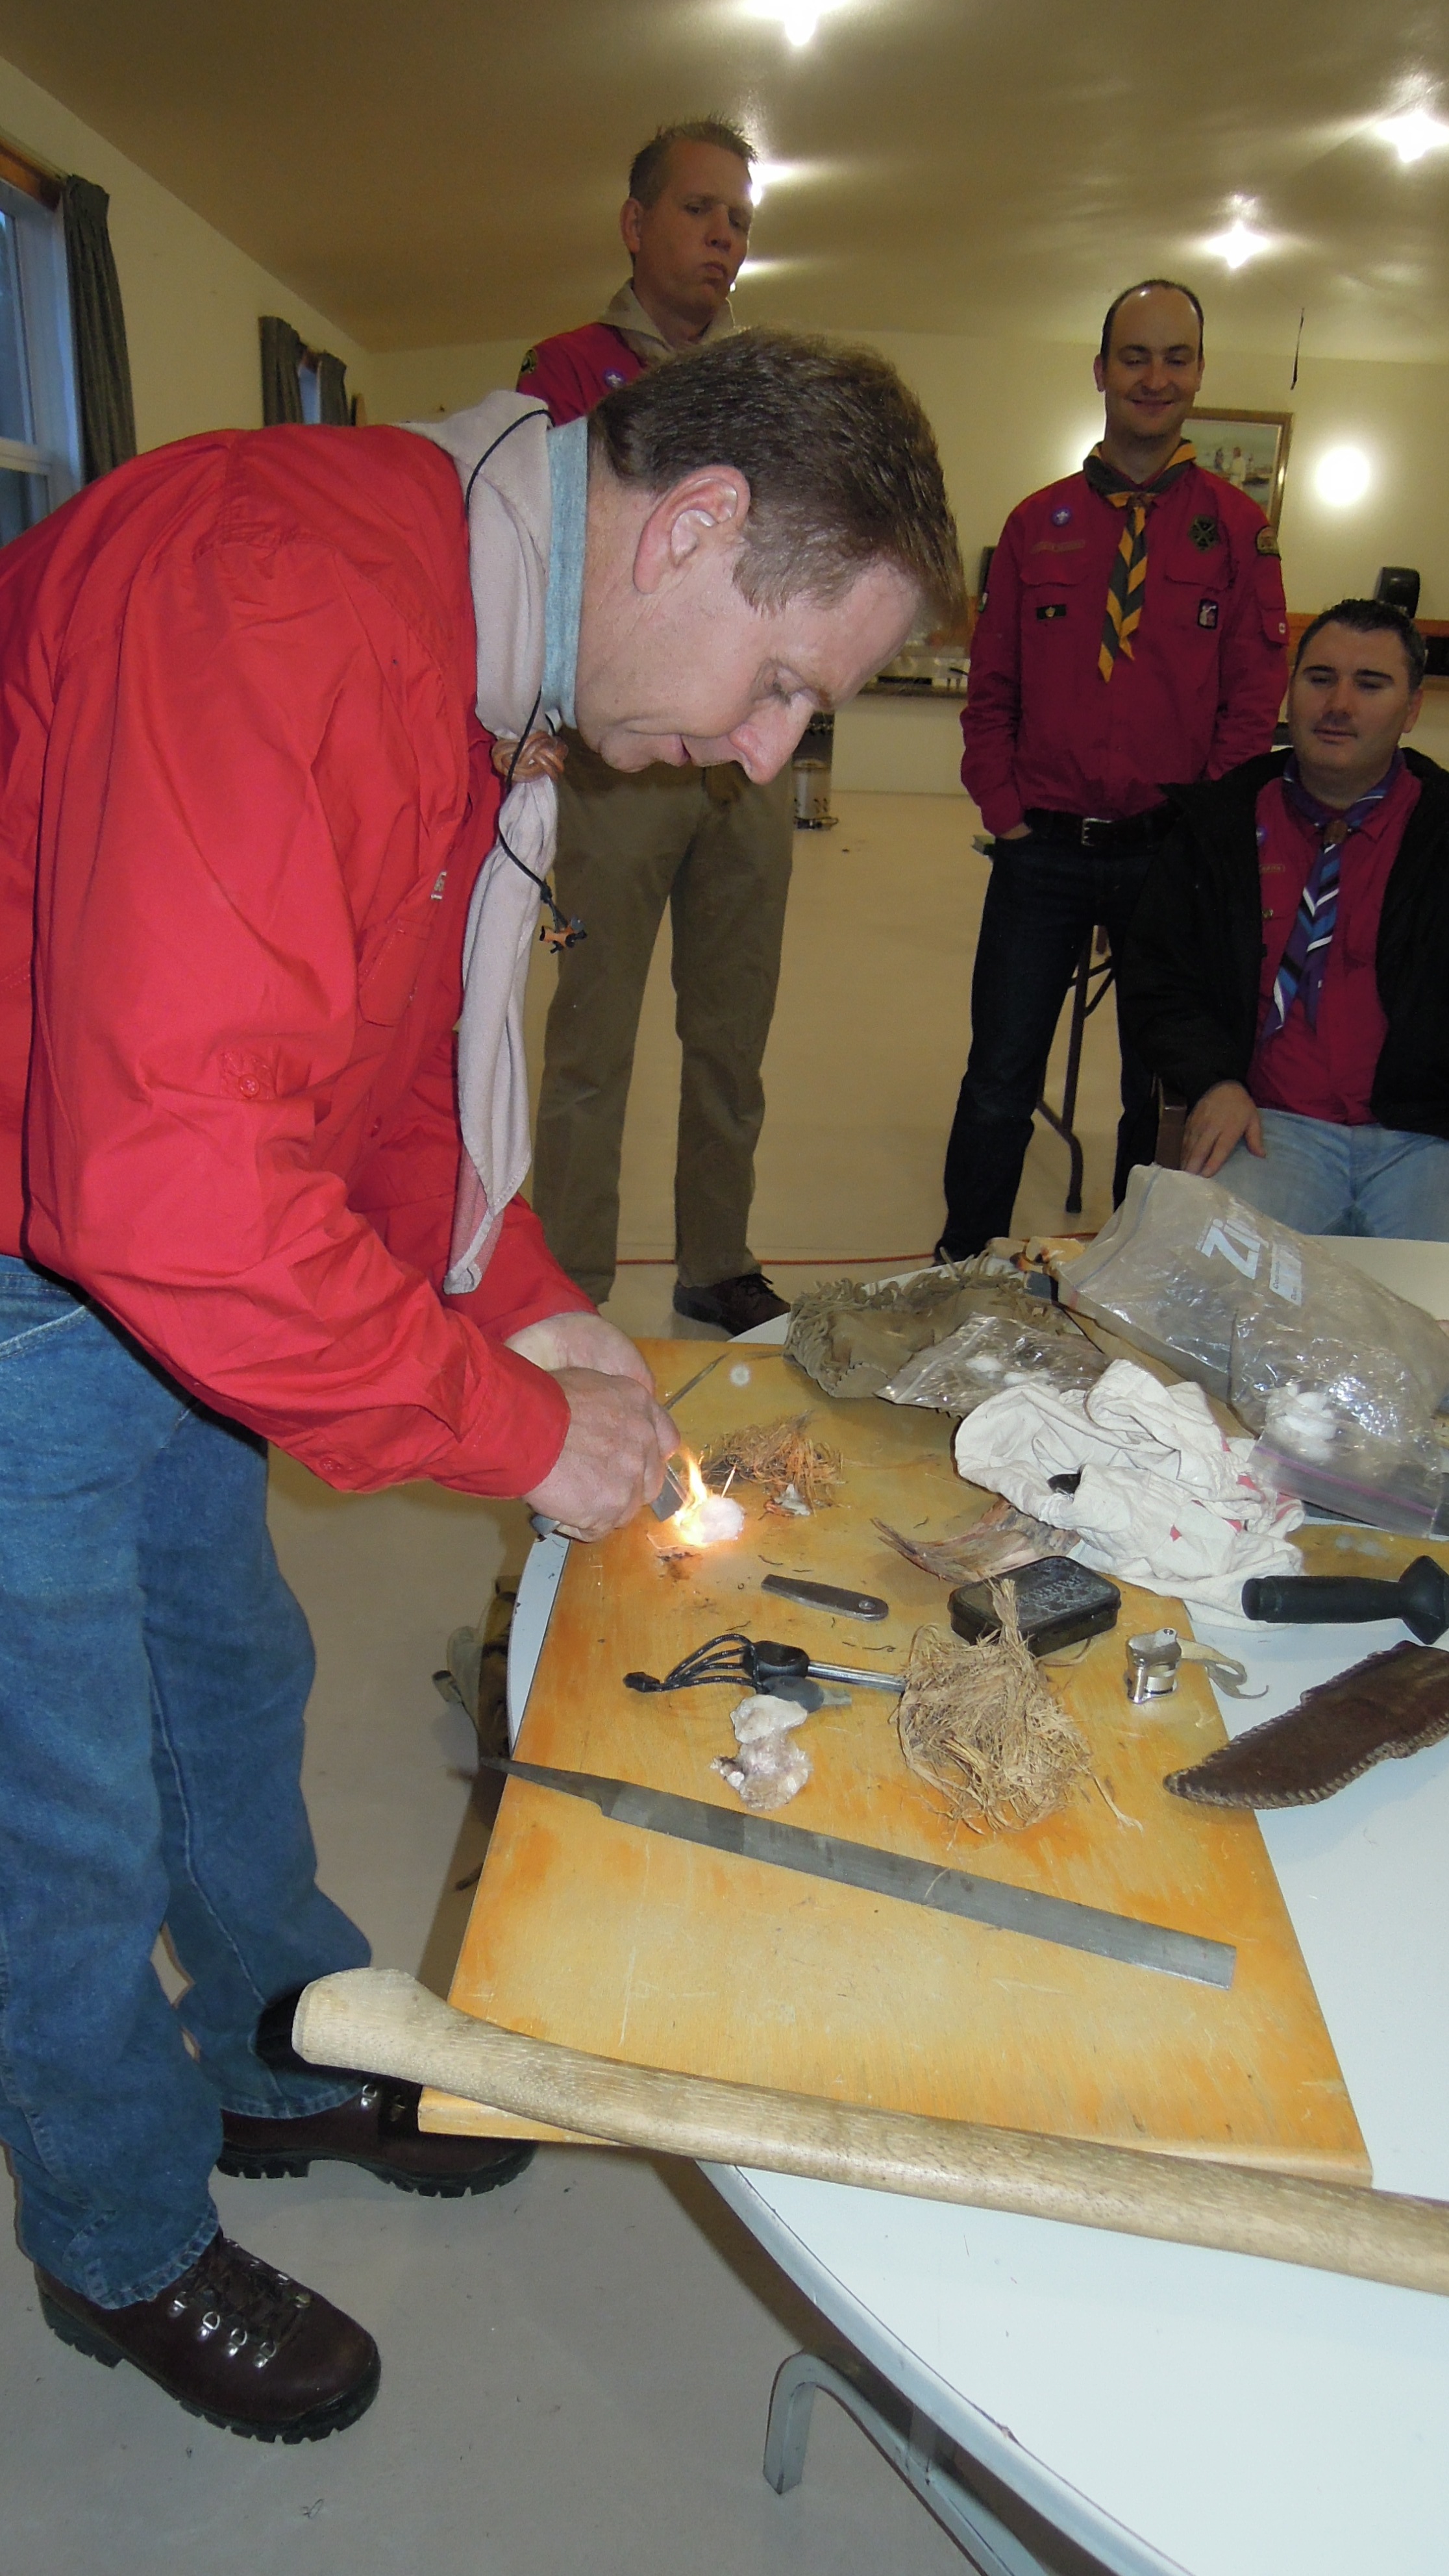
| The big guns come in to do some fire /axe /saw / cooking training. | |||
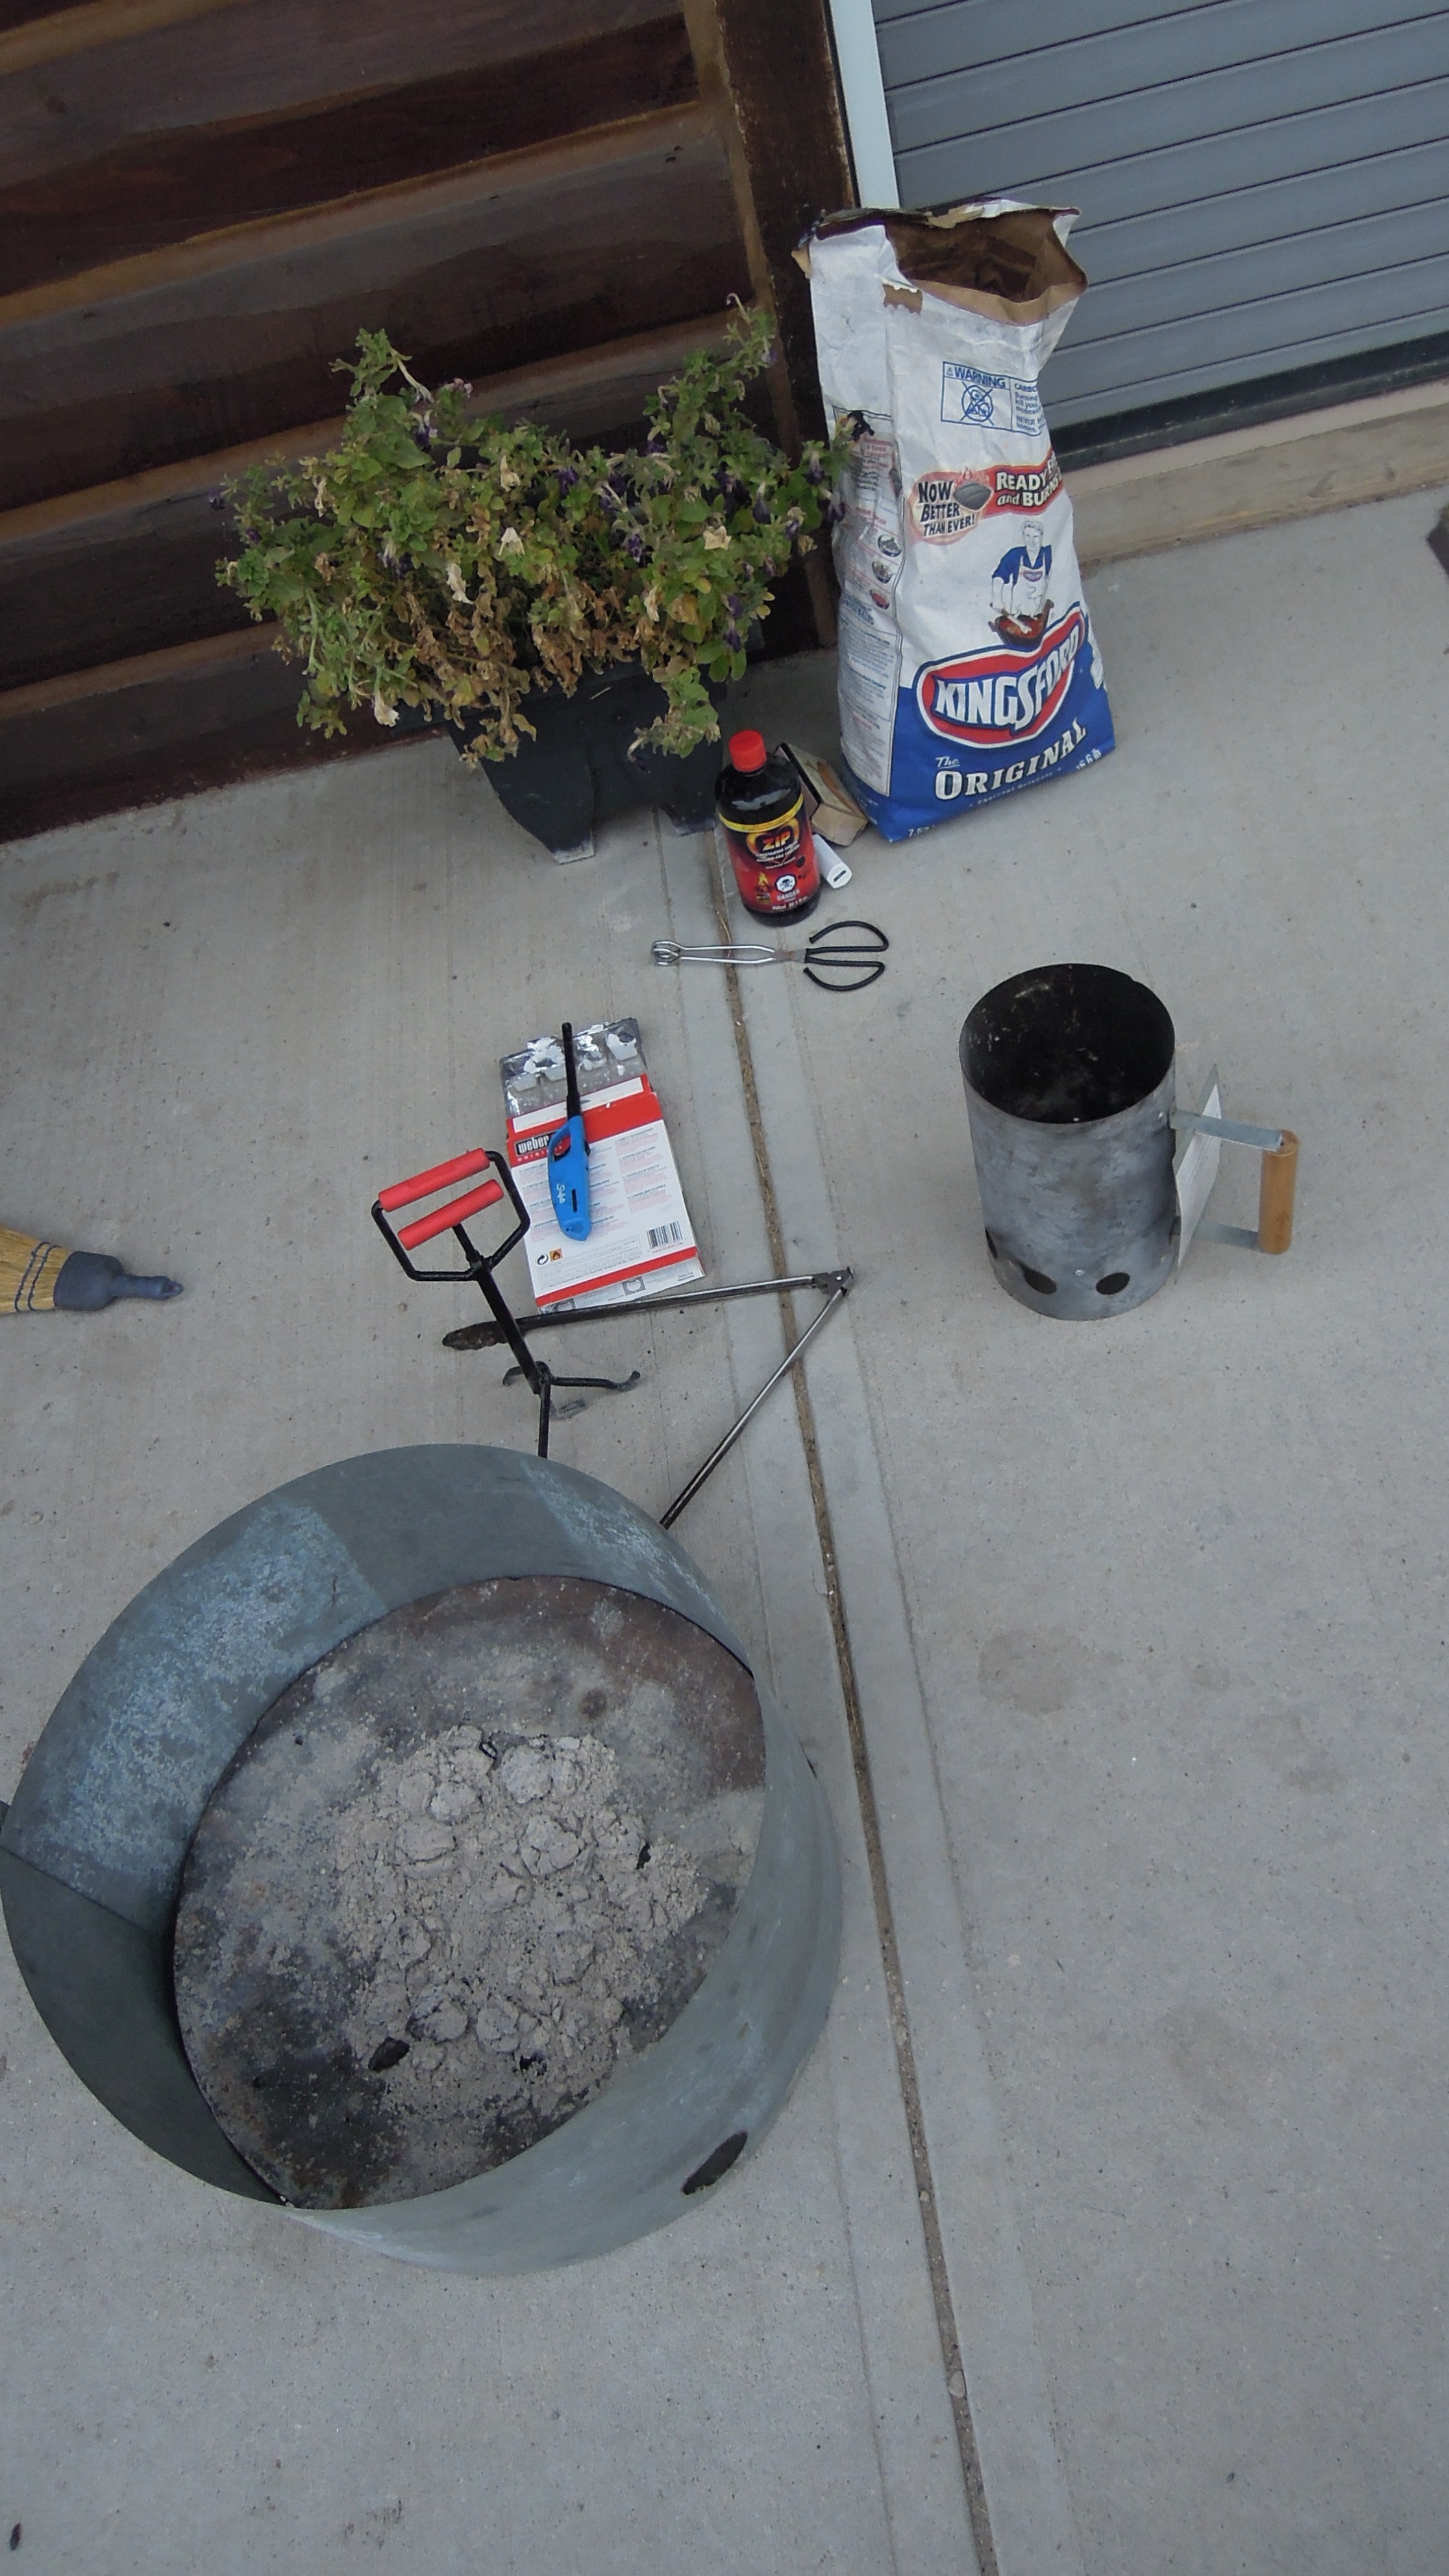
 Some basic fire tools and supplies
 |
 Your basic tinder box. drop in some denim and put the box in a fire to
slightly burn the material.
Your basic tinder box. drop in some denim and put the box in a fire to
slightly burn the material. |
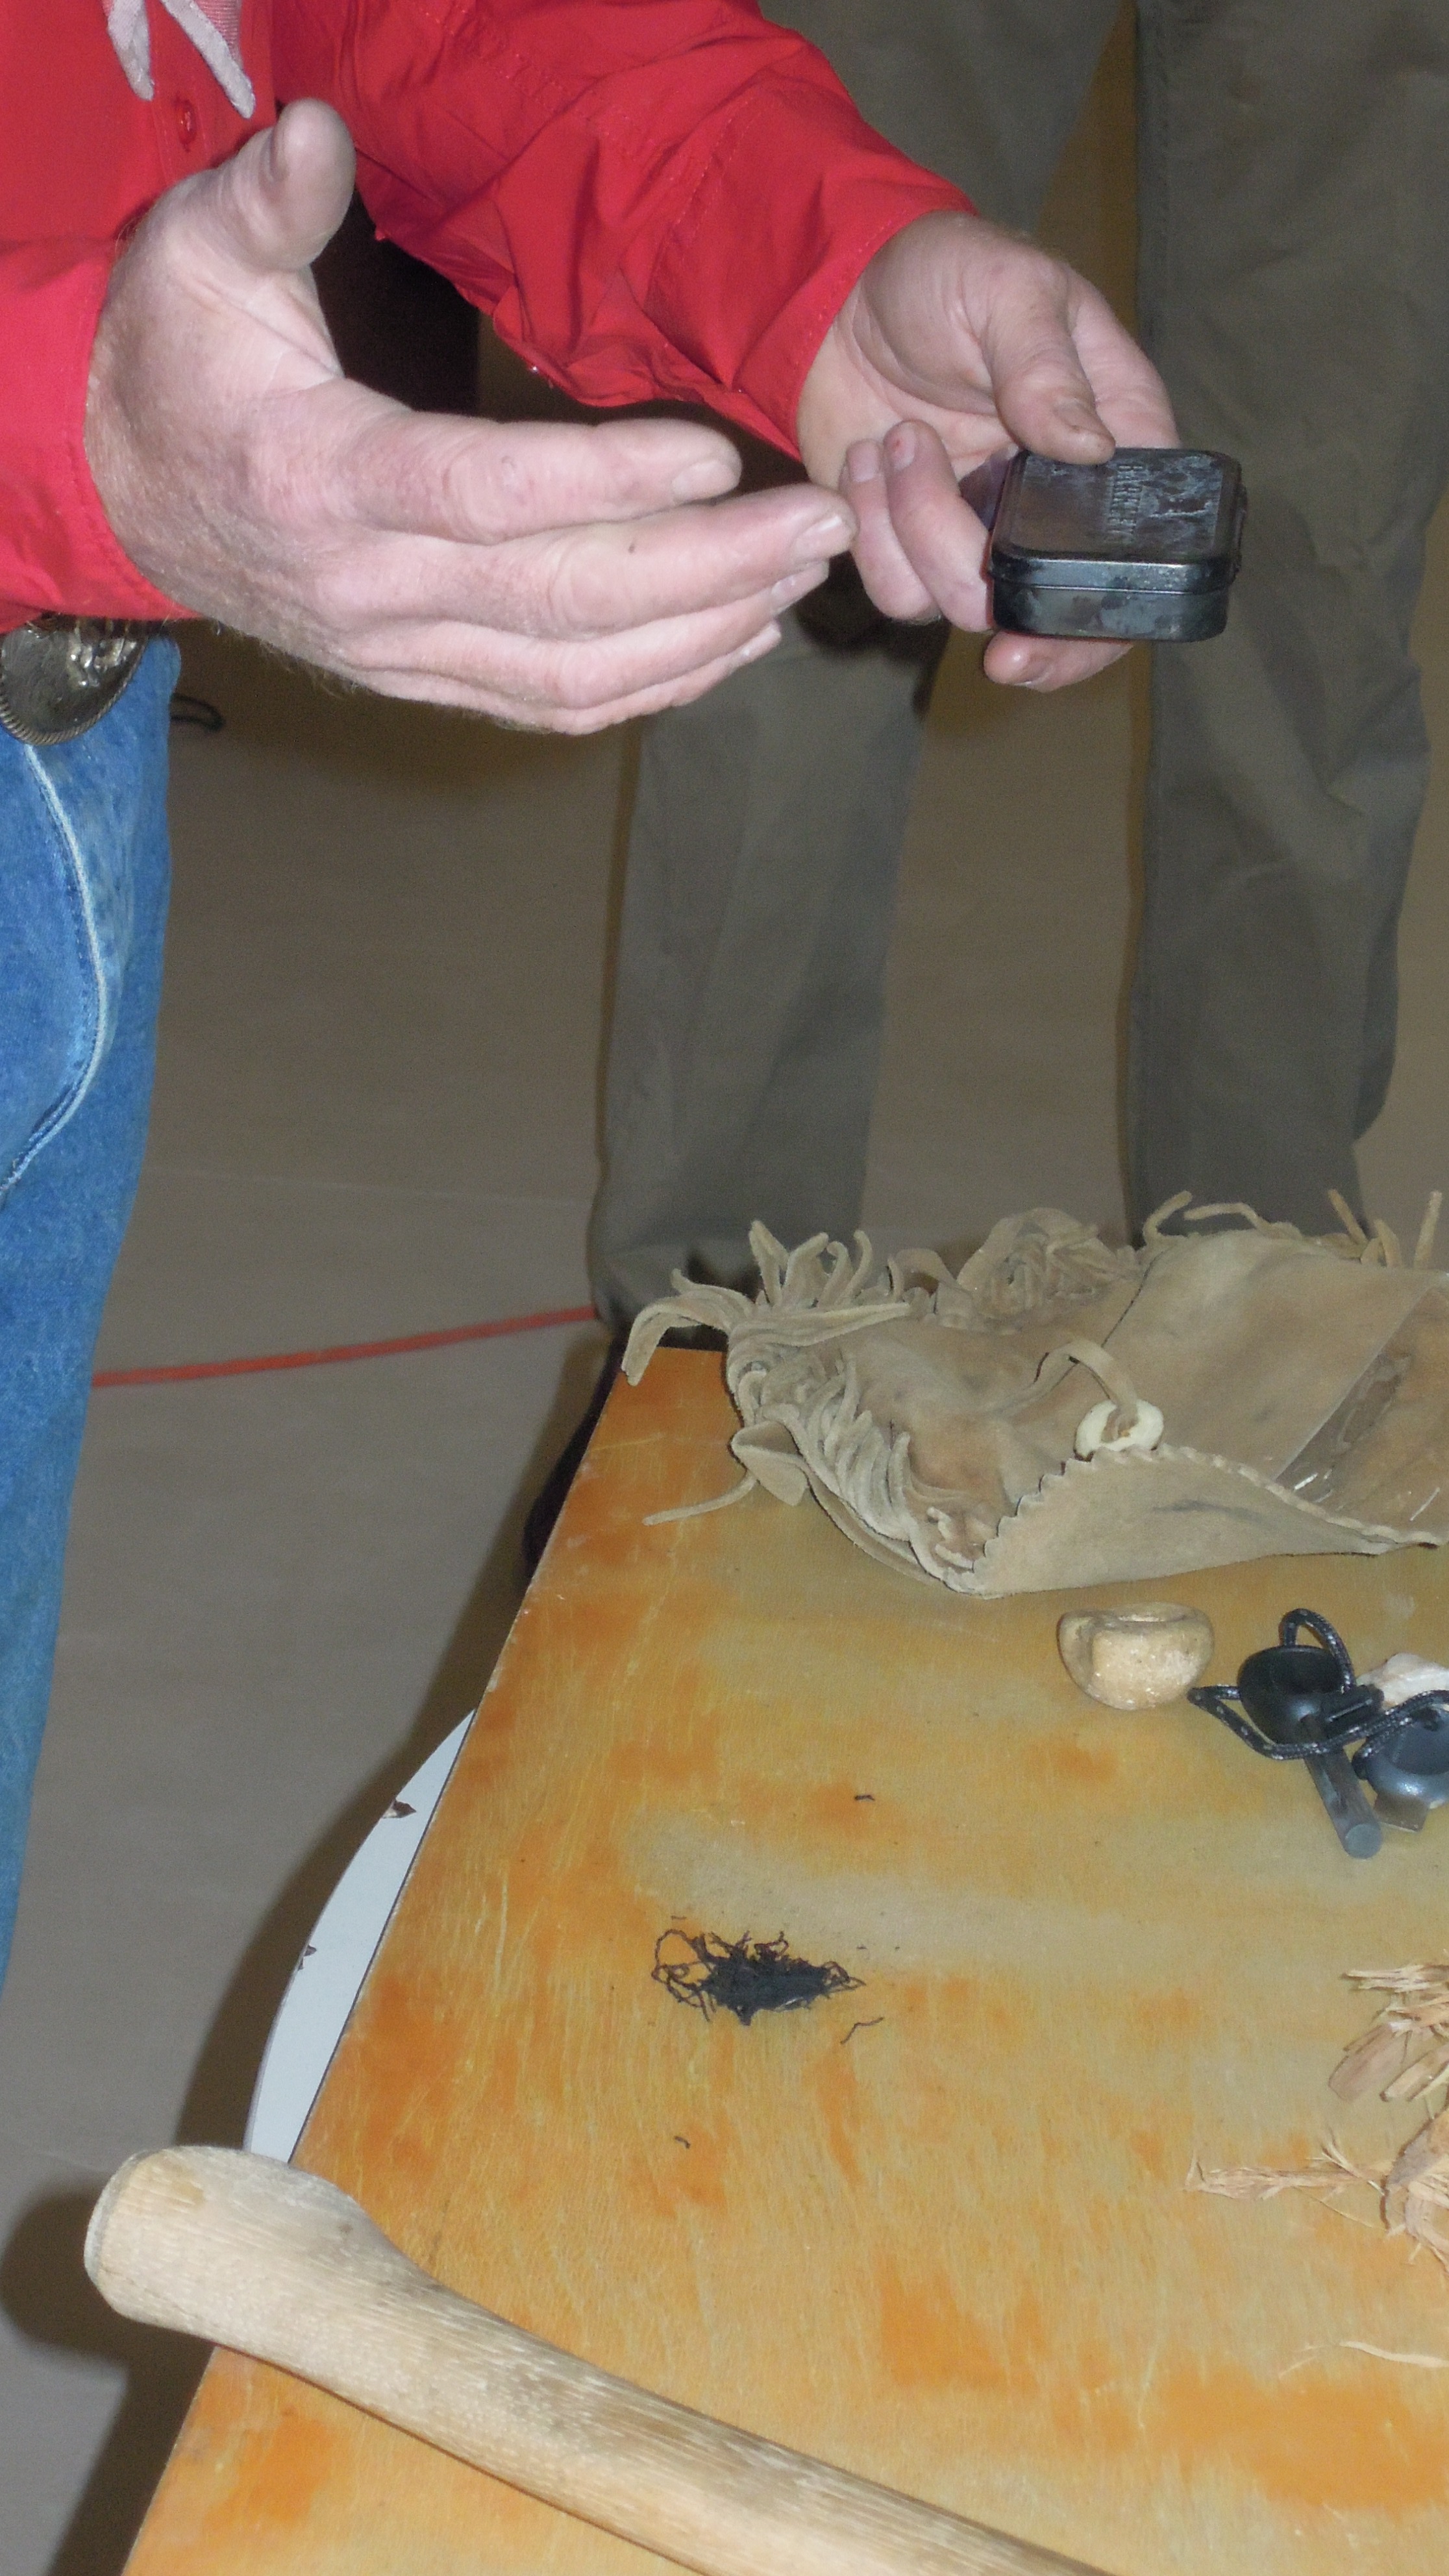 Close up of the box with it's contents on the table.
 |
 Stuff that burns from sparks: dried grass rubbed together vigorously
to expose the fine fibers, Bull Rush heads work good, just pull apart the
head and fluff up the seeds.
Stuff that burns from sparks: dried grass rubbed together vigorously
to expose the fine fibers, Bull Rush heads work good, just pull apart the
head and fluff up the seeds. |
|
Make sure it's dry, cotton balls with a bit of Vaseline rubbed in work
well to. |
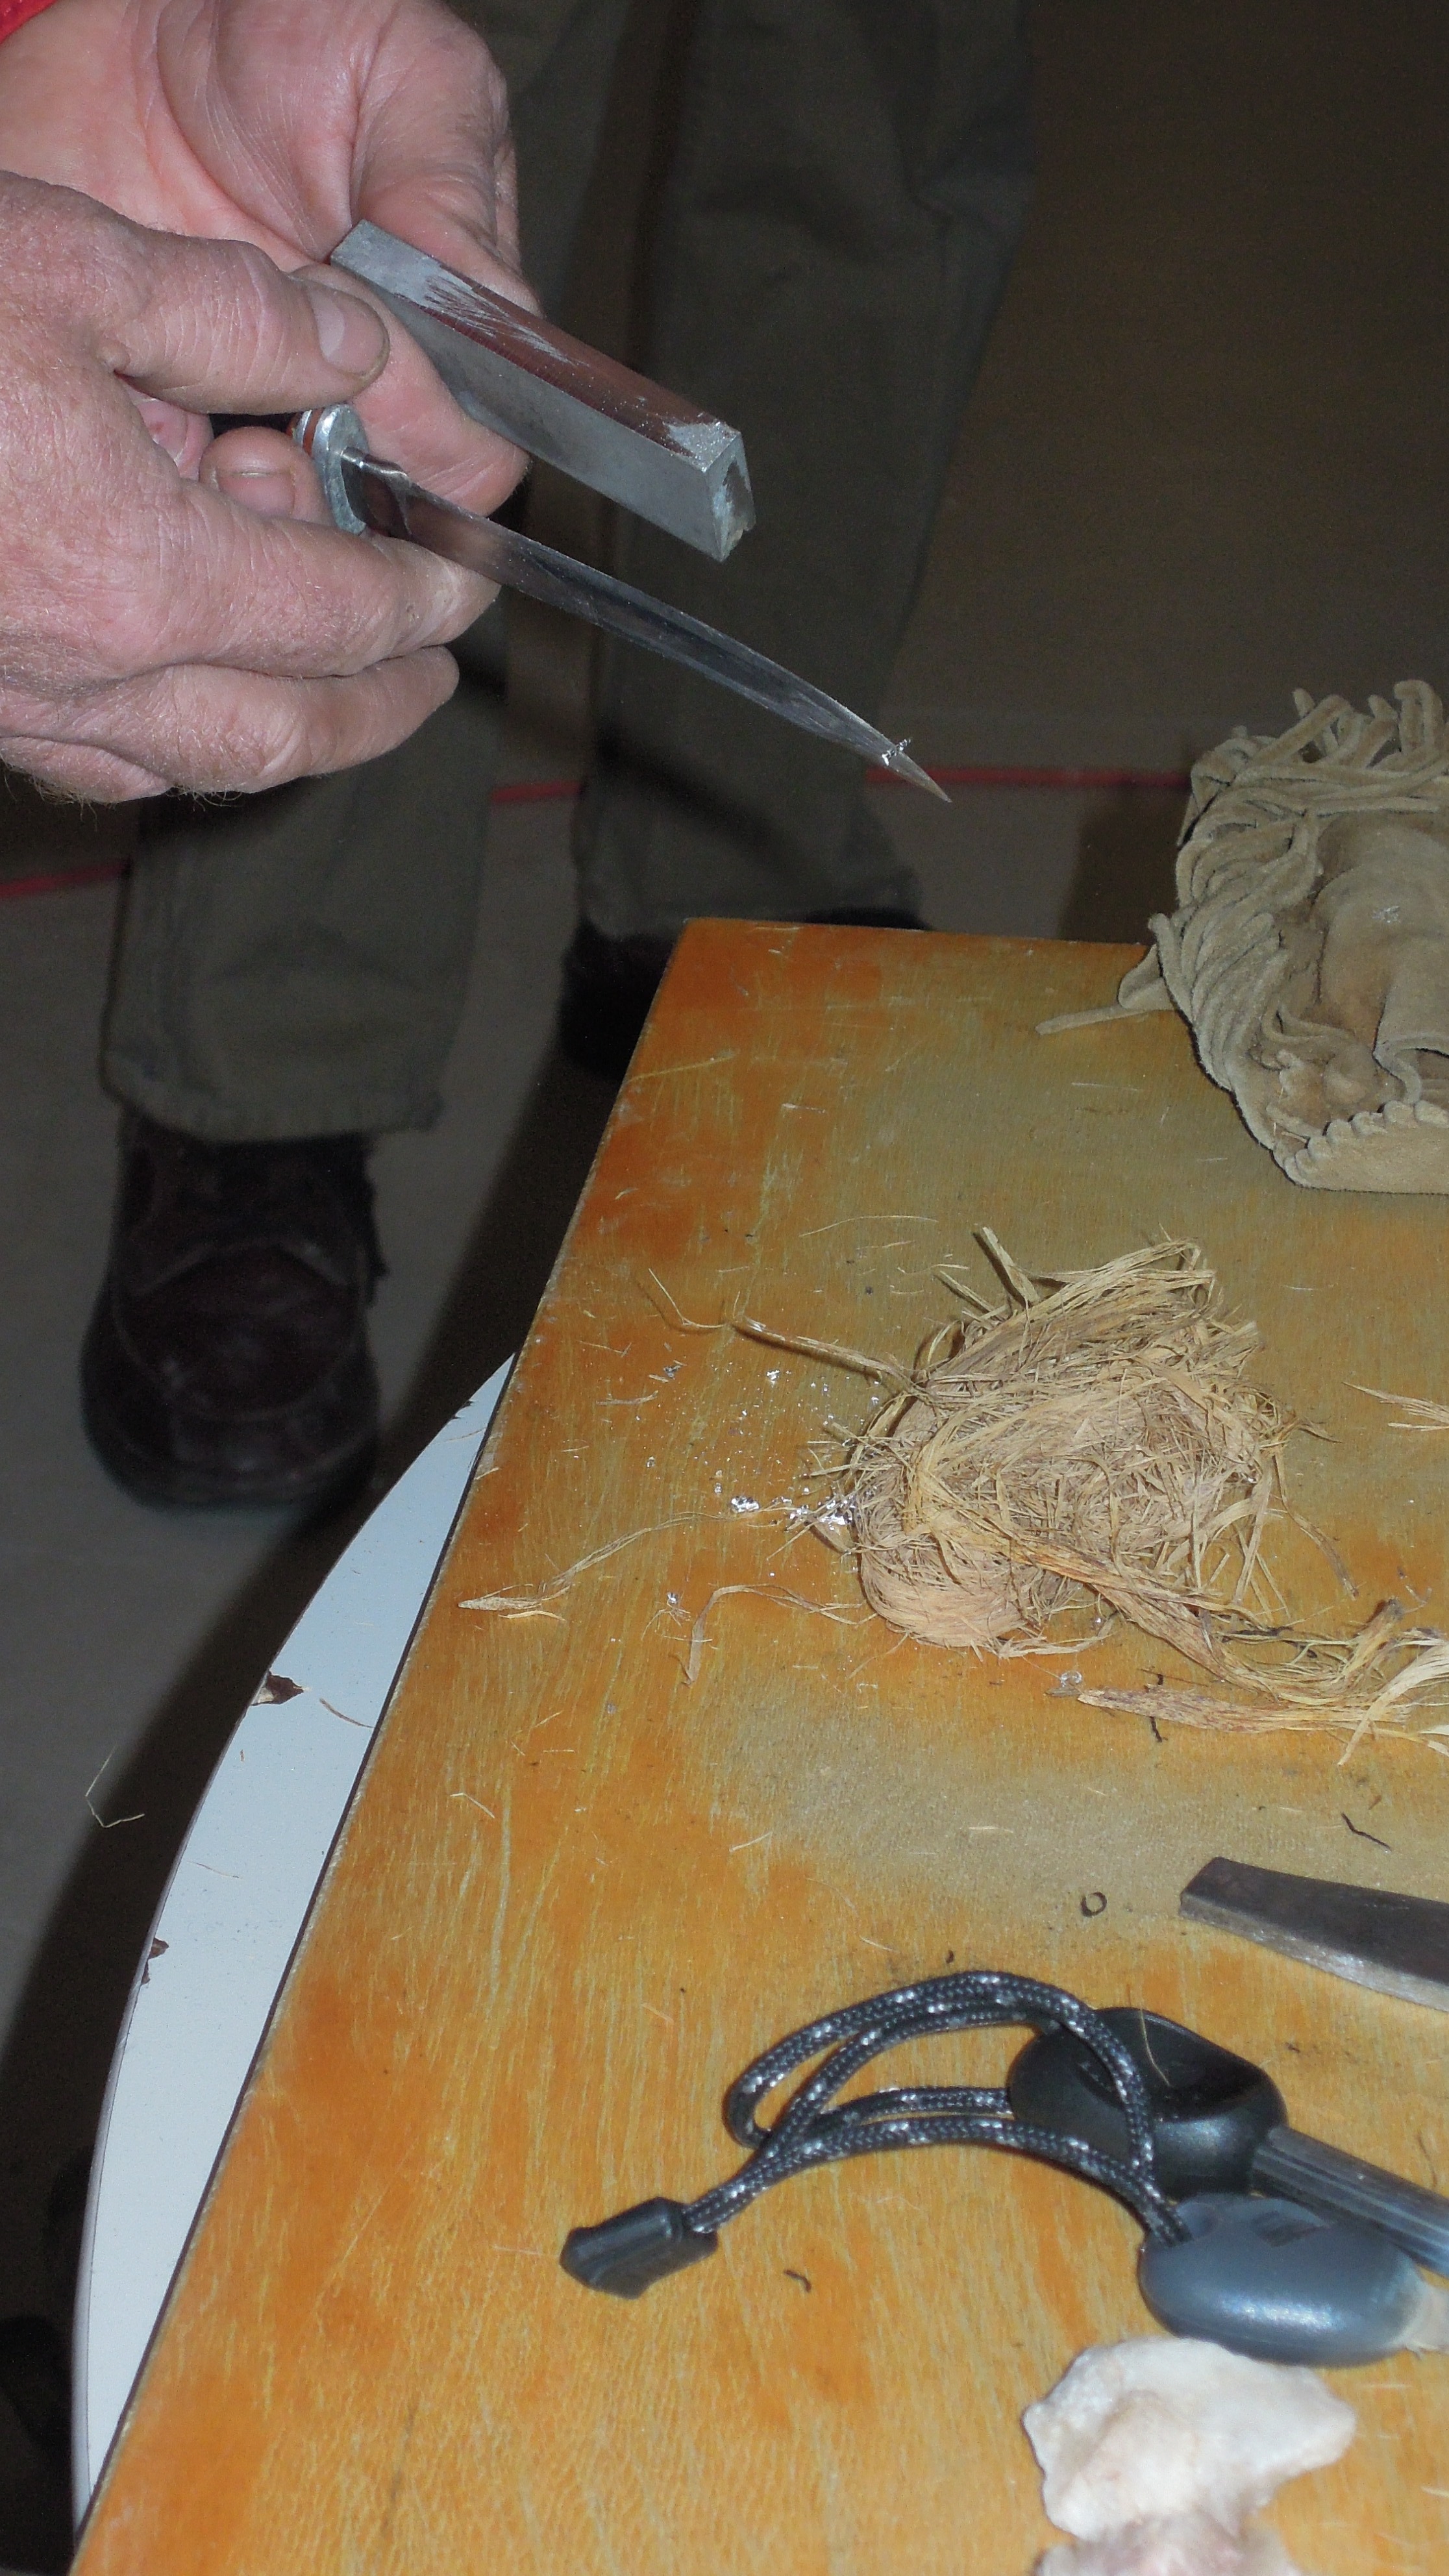
 Then get your flint and an knife and scrape the sparks towards your dry
fuel.
Then get your flint and an knife and scrape the sparks towards your dry
fuel. |
 For flint it's all about the hardness of the metal. He had an old file
handle he used.
For flint it's all about the hardness of the metal. He had an old file
handle he used. |
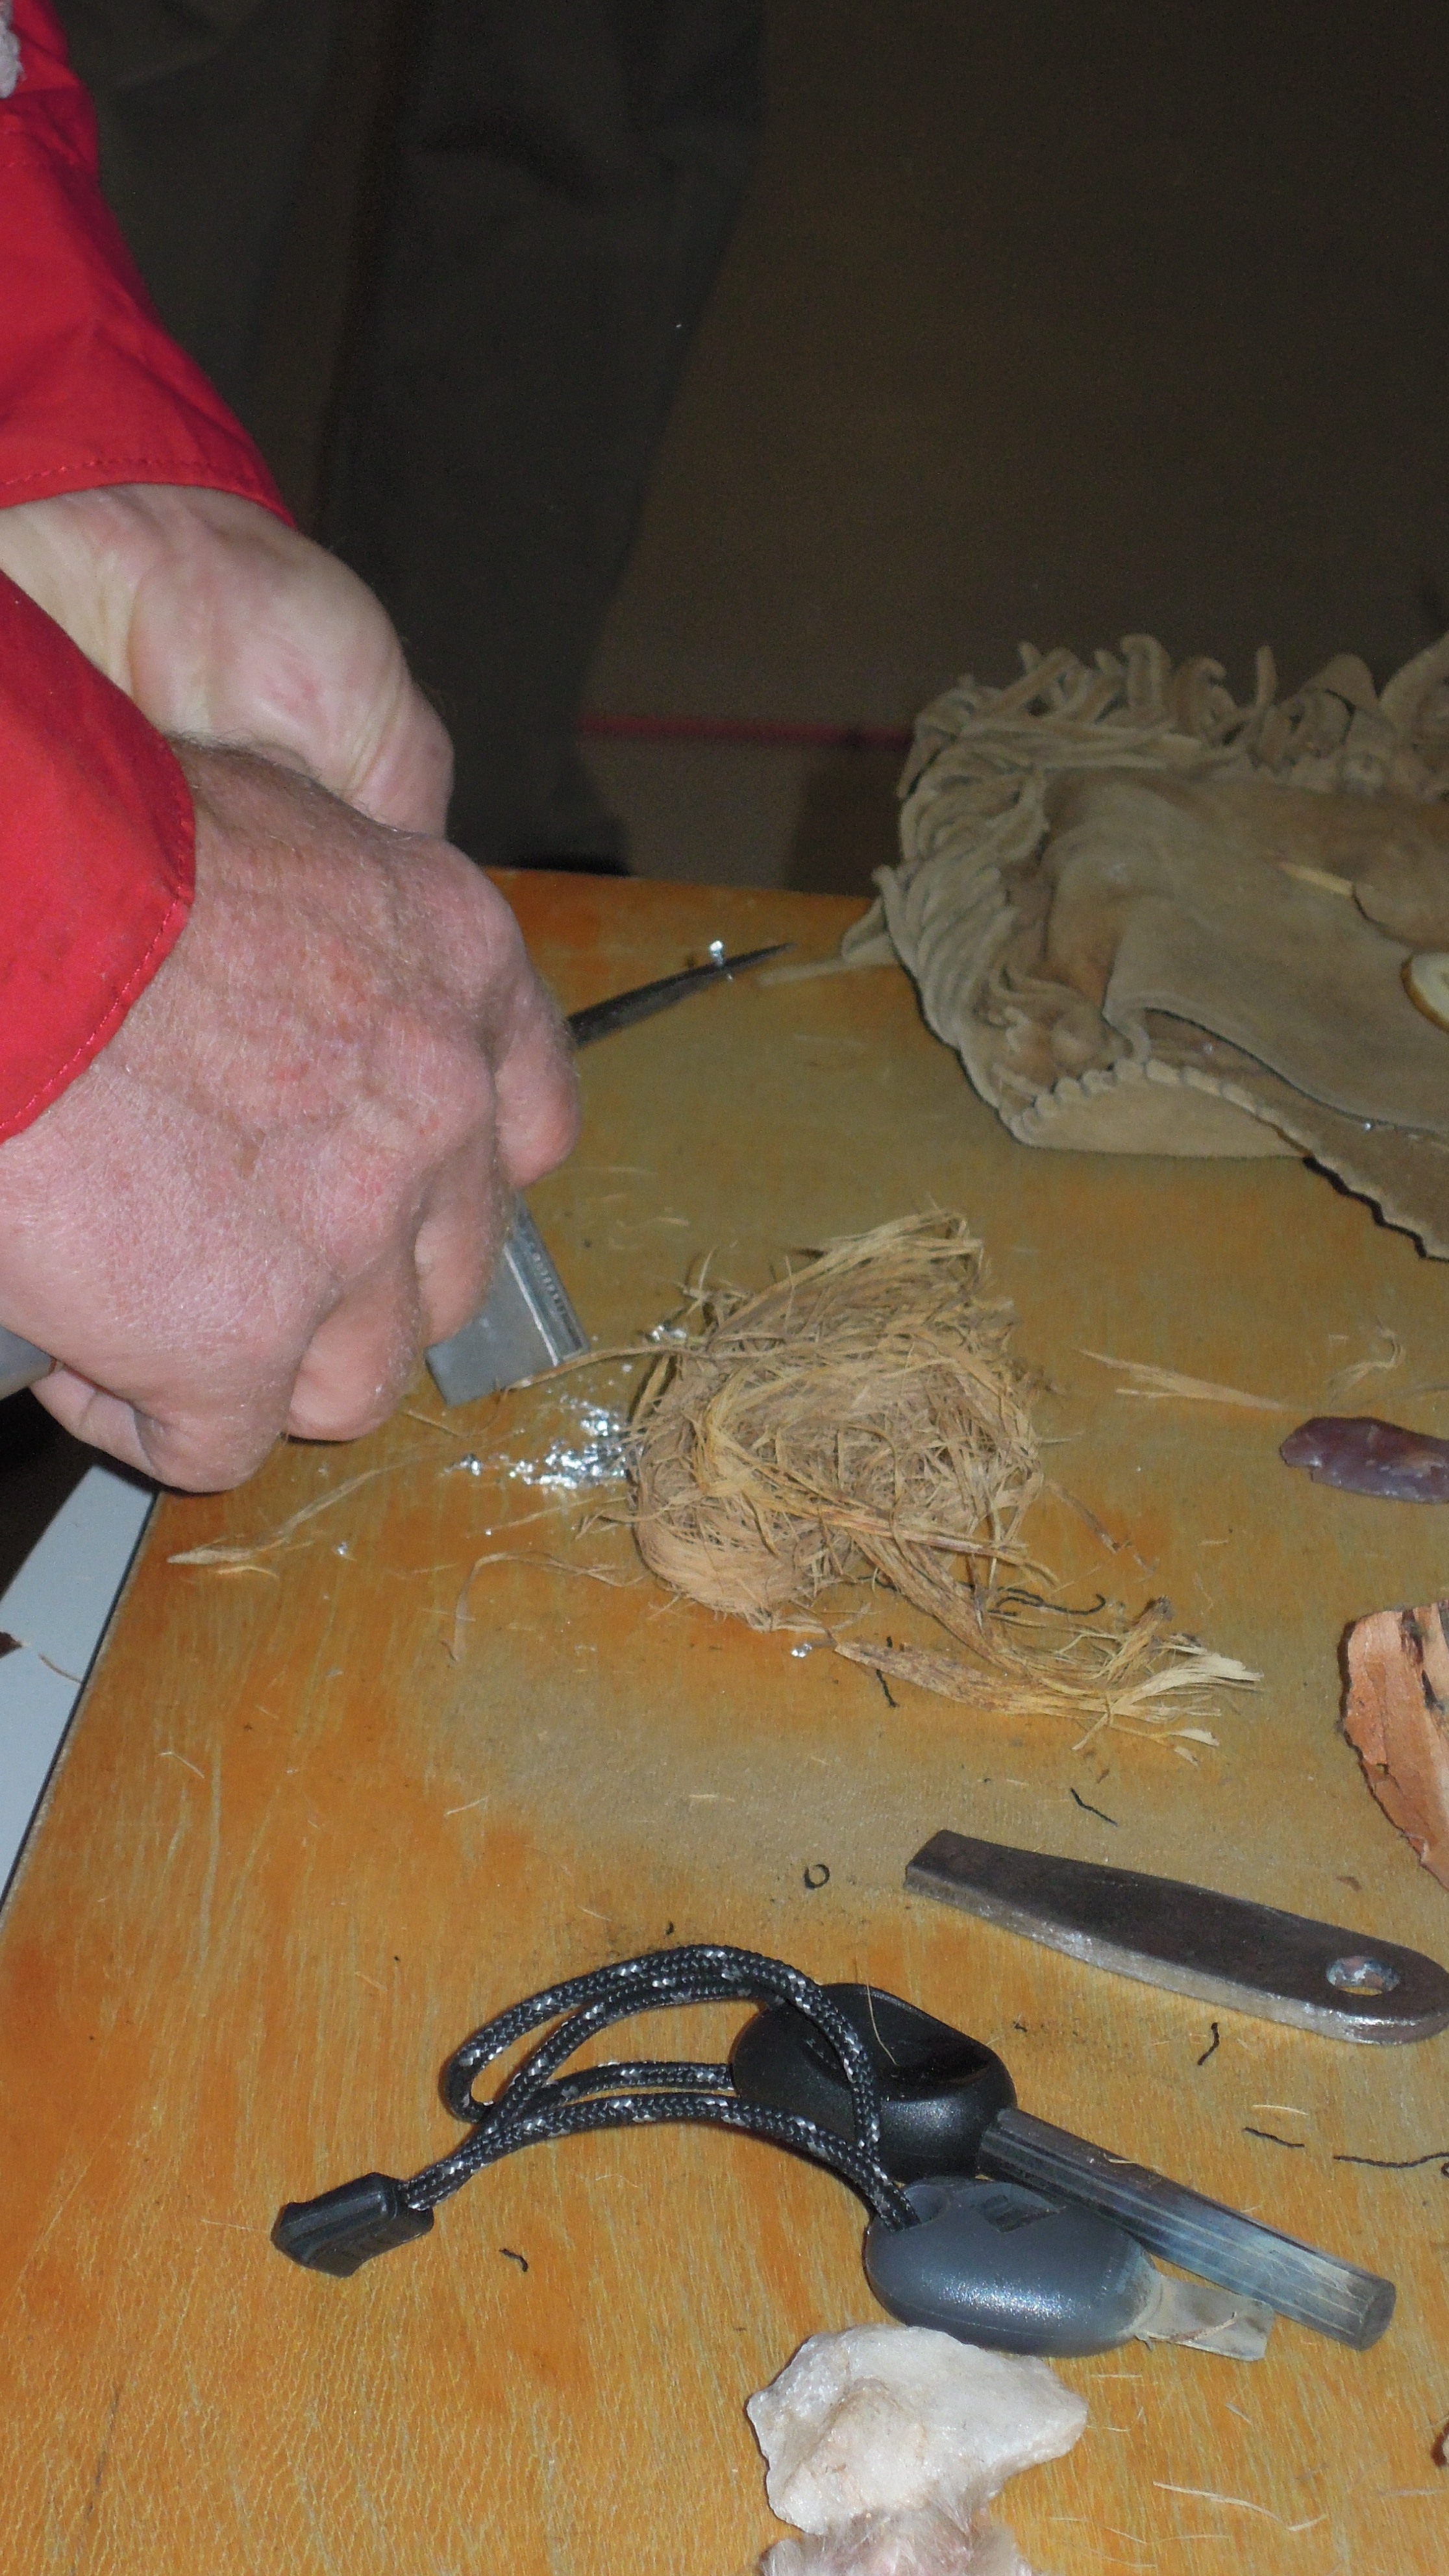
 Drive some sparks into the cotton ball...
 |
 and we have ignition.
 |
 Try some bull rush fluff...
 |
 nicely burning now...
 |
|
 Using magnesium shavings this time. Give a nice hot burn and won't be
effected if it got wet.
Using magnesium shavings this time. Give a nice hot burn and won't be
effected if it got wet. |
 Get a little pile of shavings going here...
 |
 Use the file handle and the opposite edge of the magnesium stick for the
sparks...
Use the file handle and the opposite edge of the magnesium stick for the
sparks... |
 and snuff it out before the fire alarms go off.
 |
 He preferred using flint to make fires from sparks.
 |
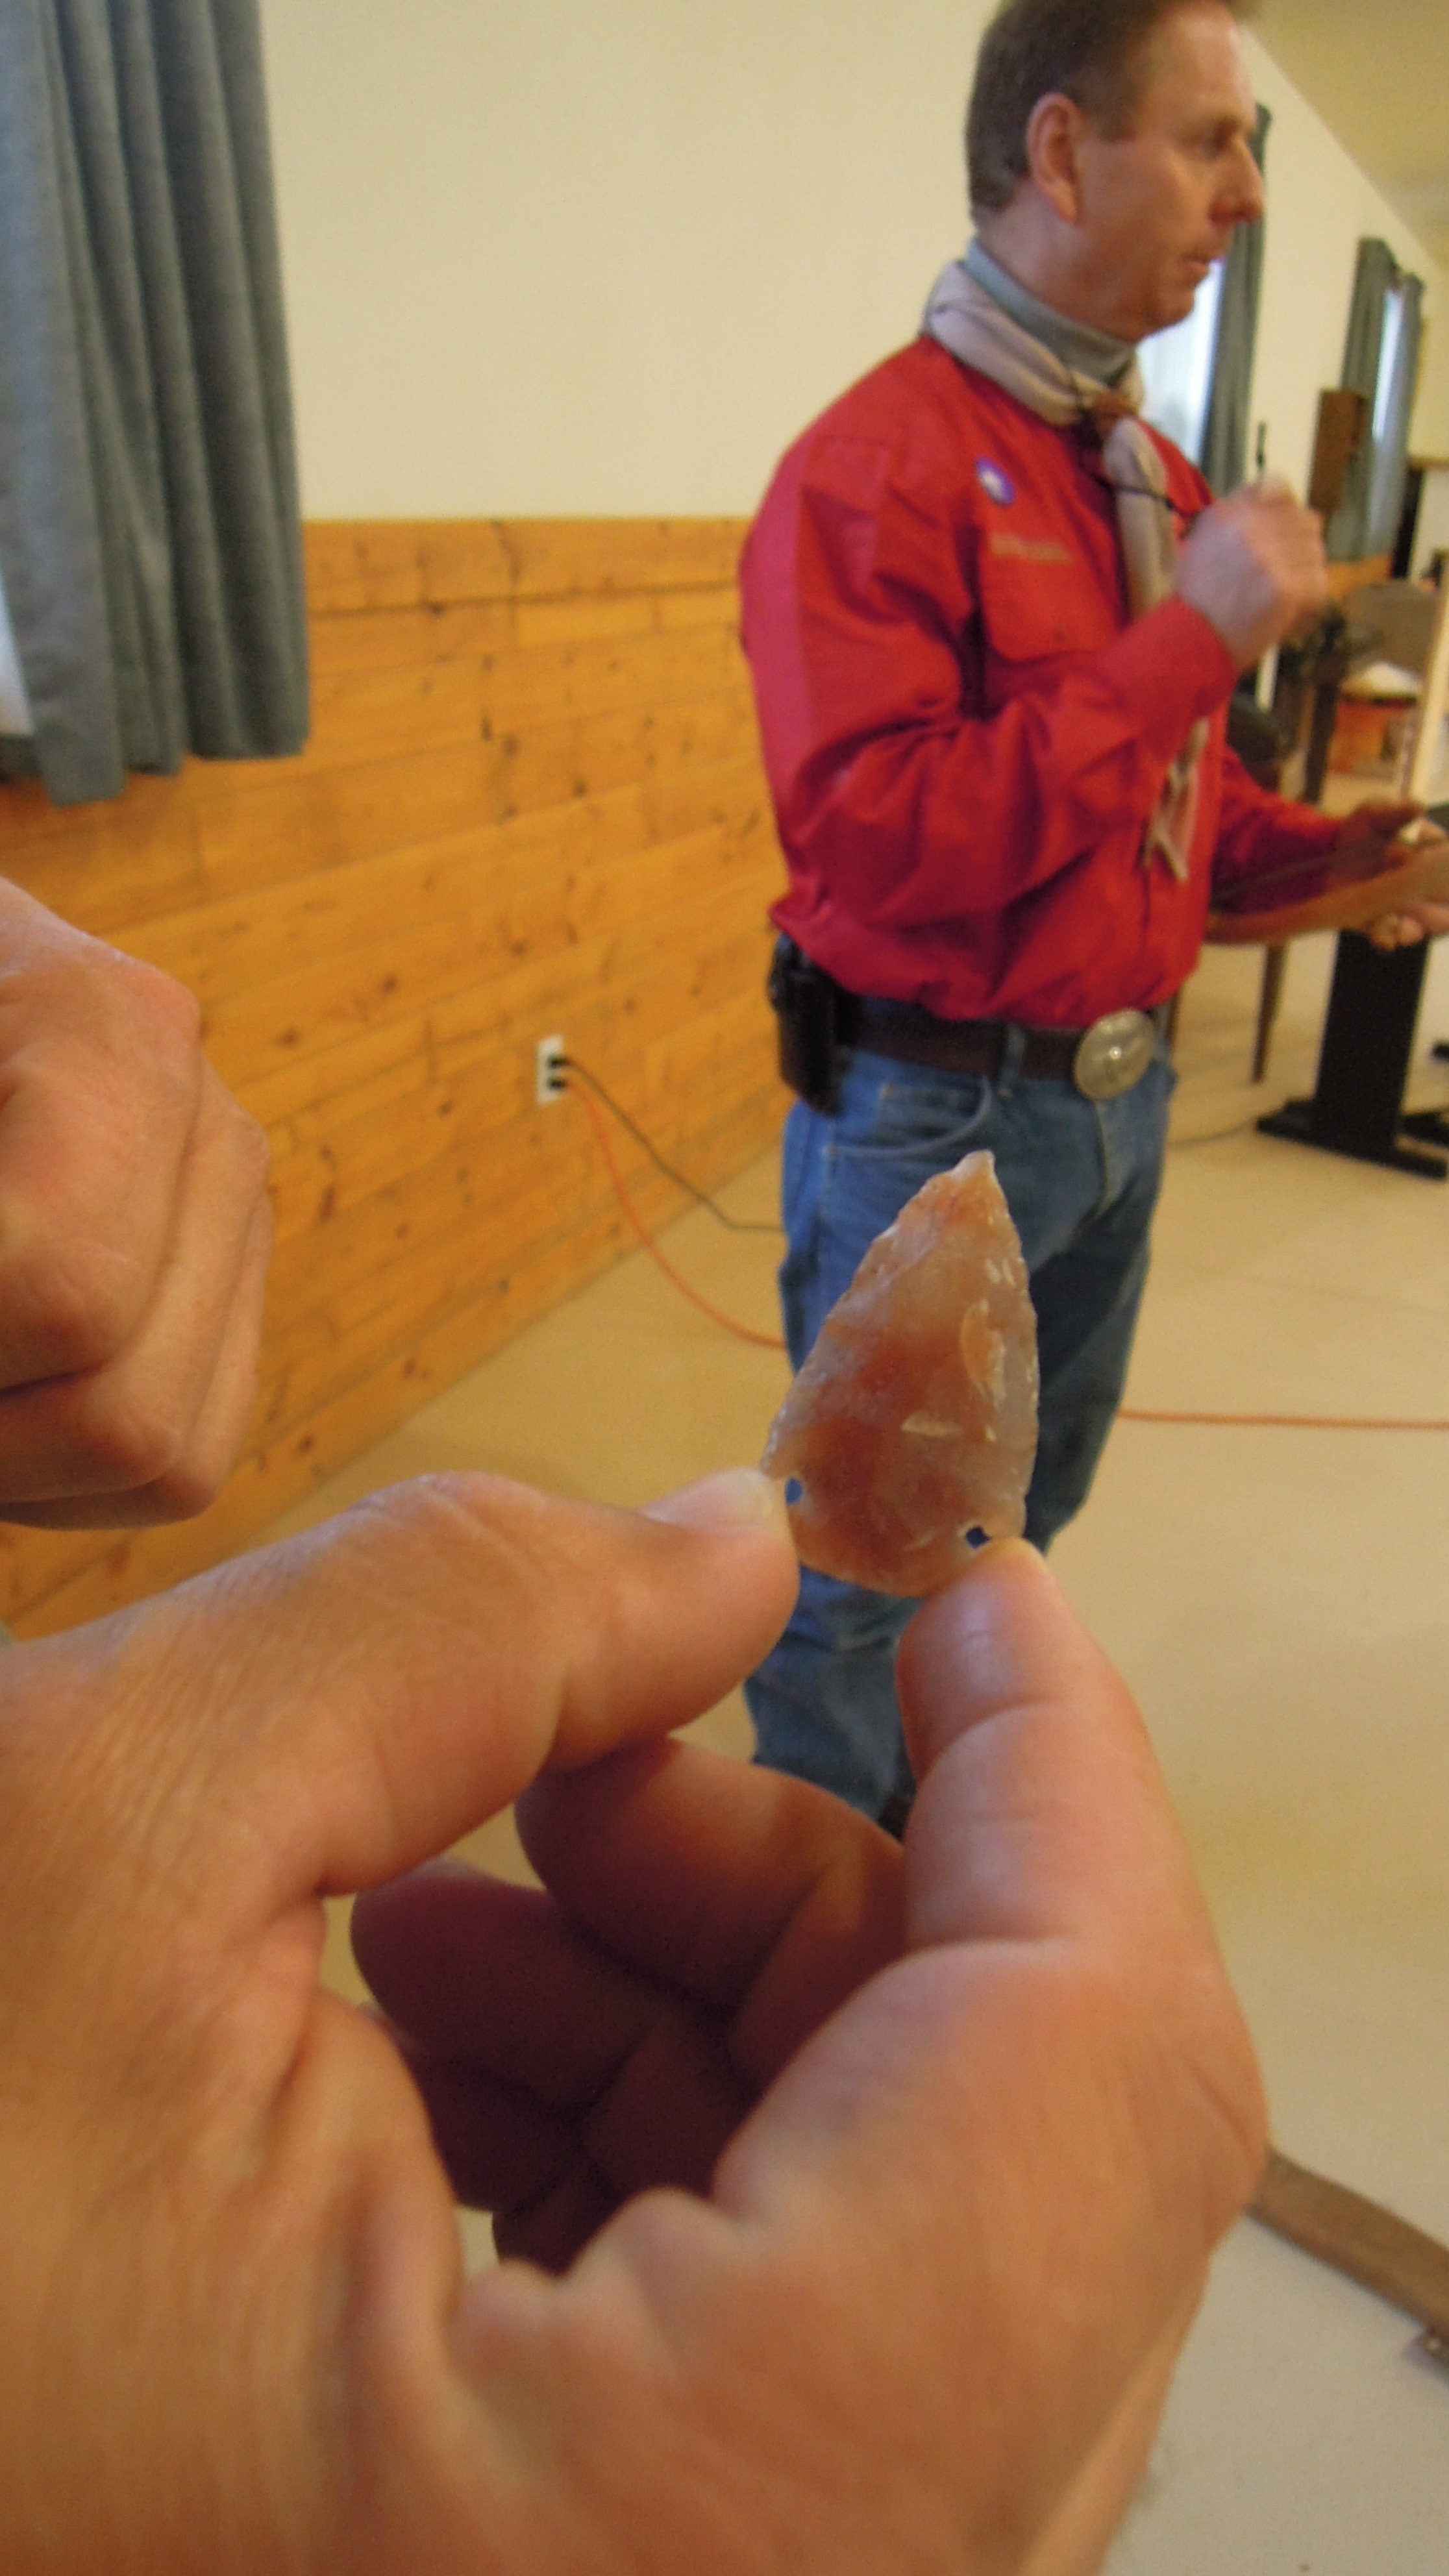
 There were other hard stones you could use: Chert, Jasper, Quartzite and
even Obsidian.
There were other hard stones you could use: Chert, Jasper, Quartzite and
even Obsidian. |
||
 Potassium Permanganate has some interesting fire starting properties as
well.
Potassium Permanganate has some interesting fire starting properties as
well. |
 Pour a little antifreeze on it and watch what happens...
 |
 Gee, seems to be smoking a bit now...
 |
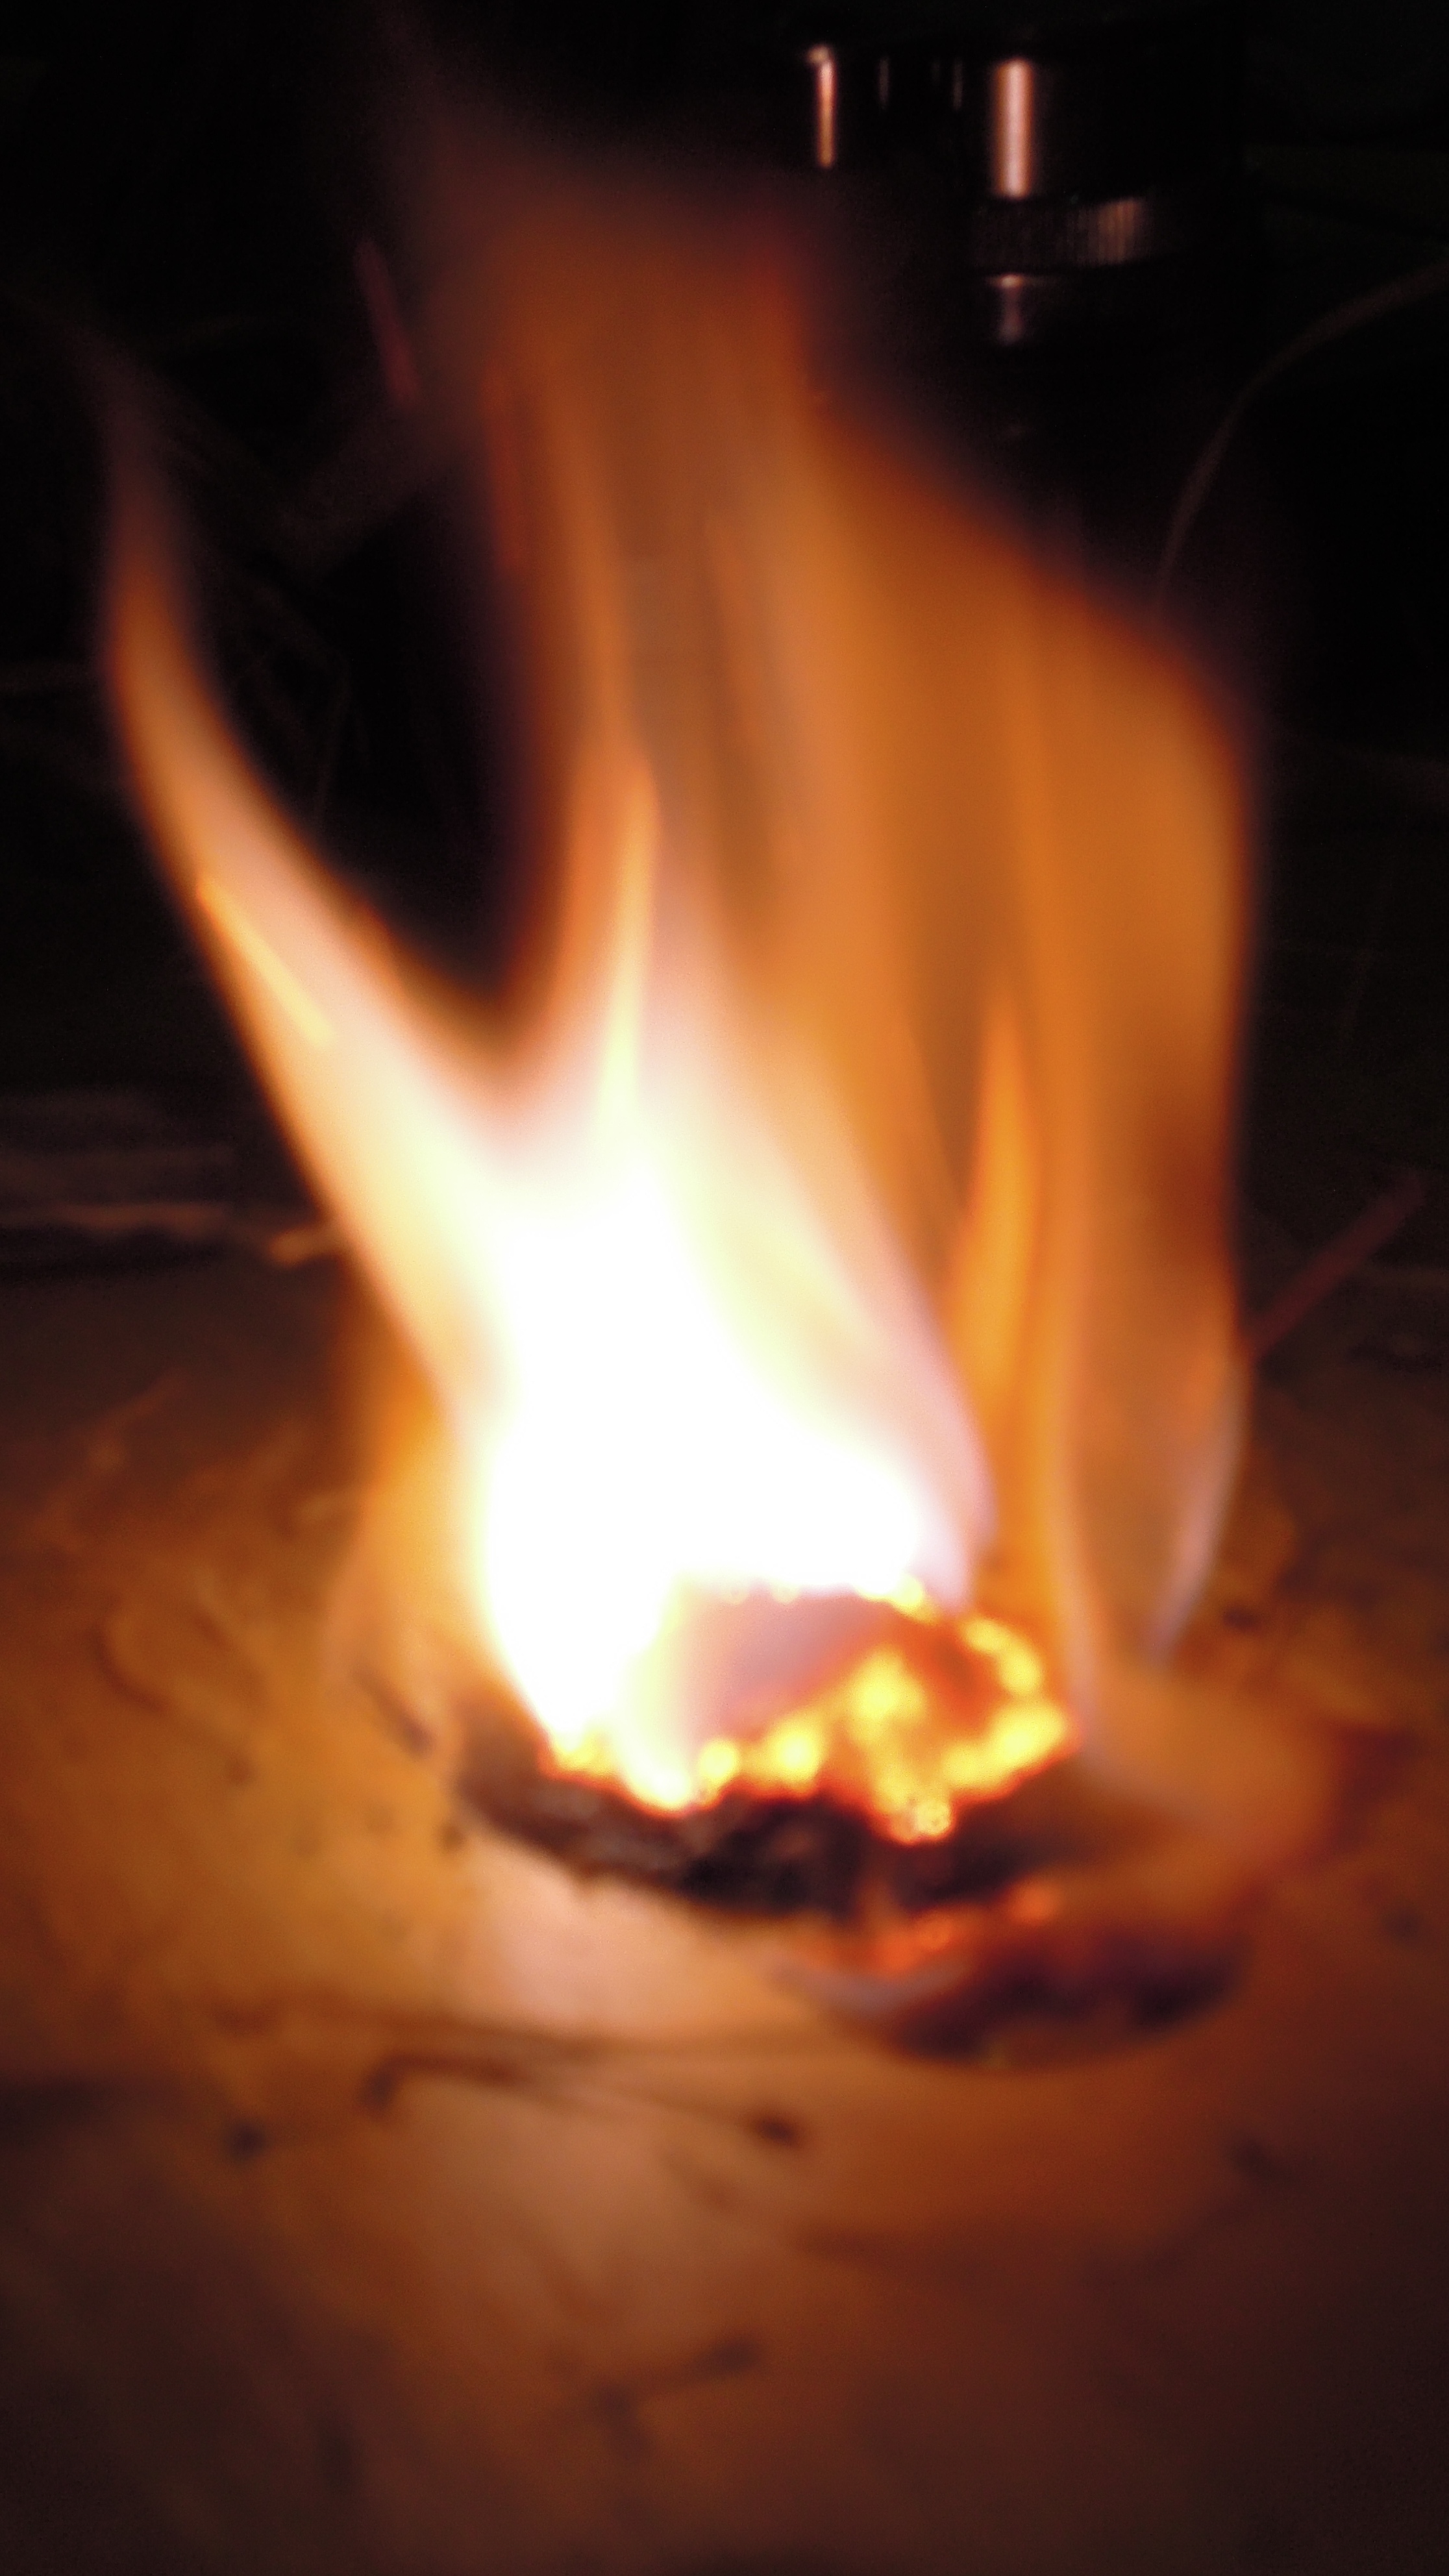 Whoa, that's cool magic for any scout leader.
 |
| The ultimate Challenge for any one who wants to call himself a Boys Scout Leader | A link to show some of the techniques he used: | http://www.wikihow.com/Start-a-Fire-with-Sticks | |
 Scouter Boyes: So with just a stick and a piece of wood you can make a
fire, right?
Scouter Boyes: So with just a stick and a piece of wood you can make a
fire, right? |
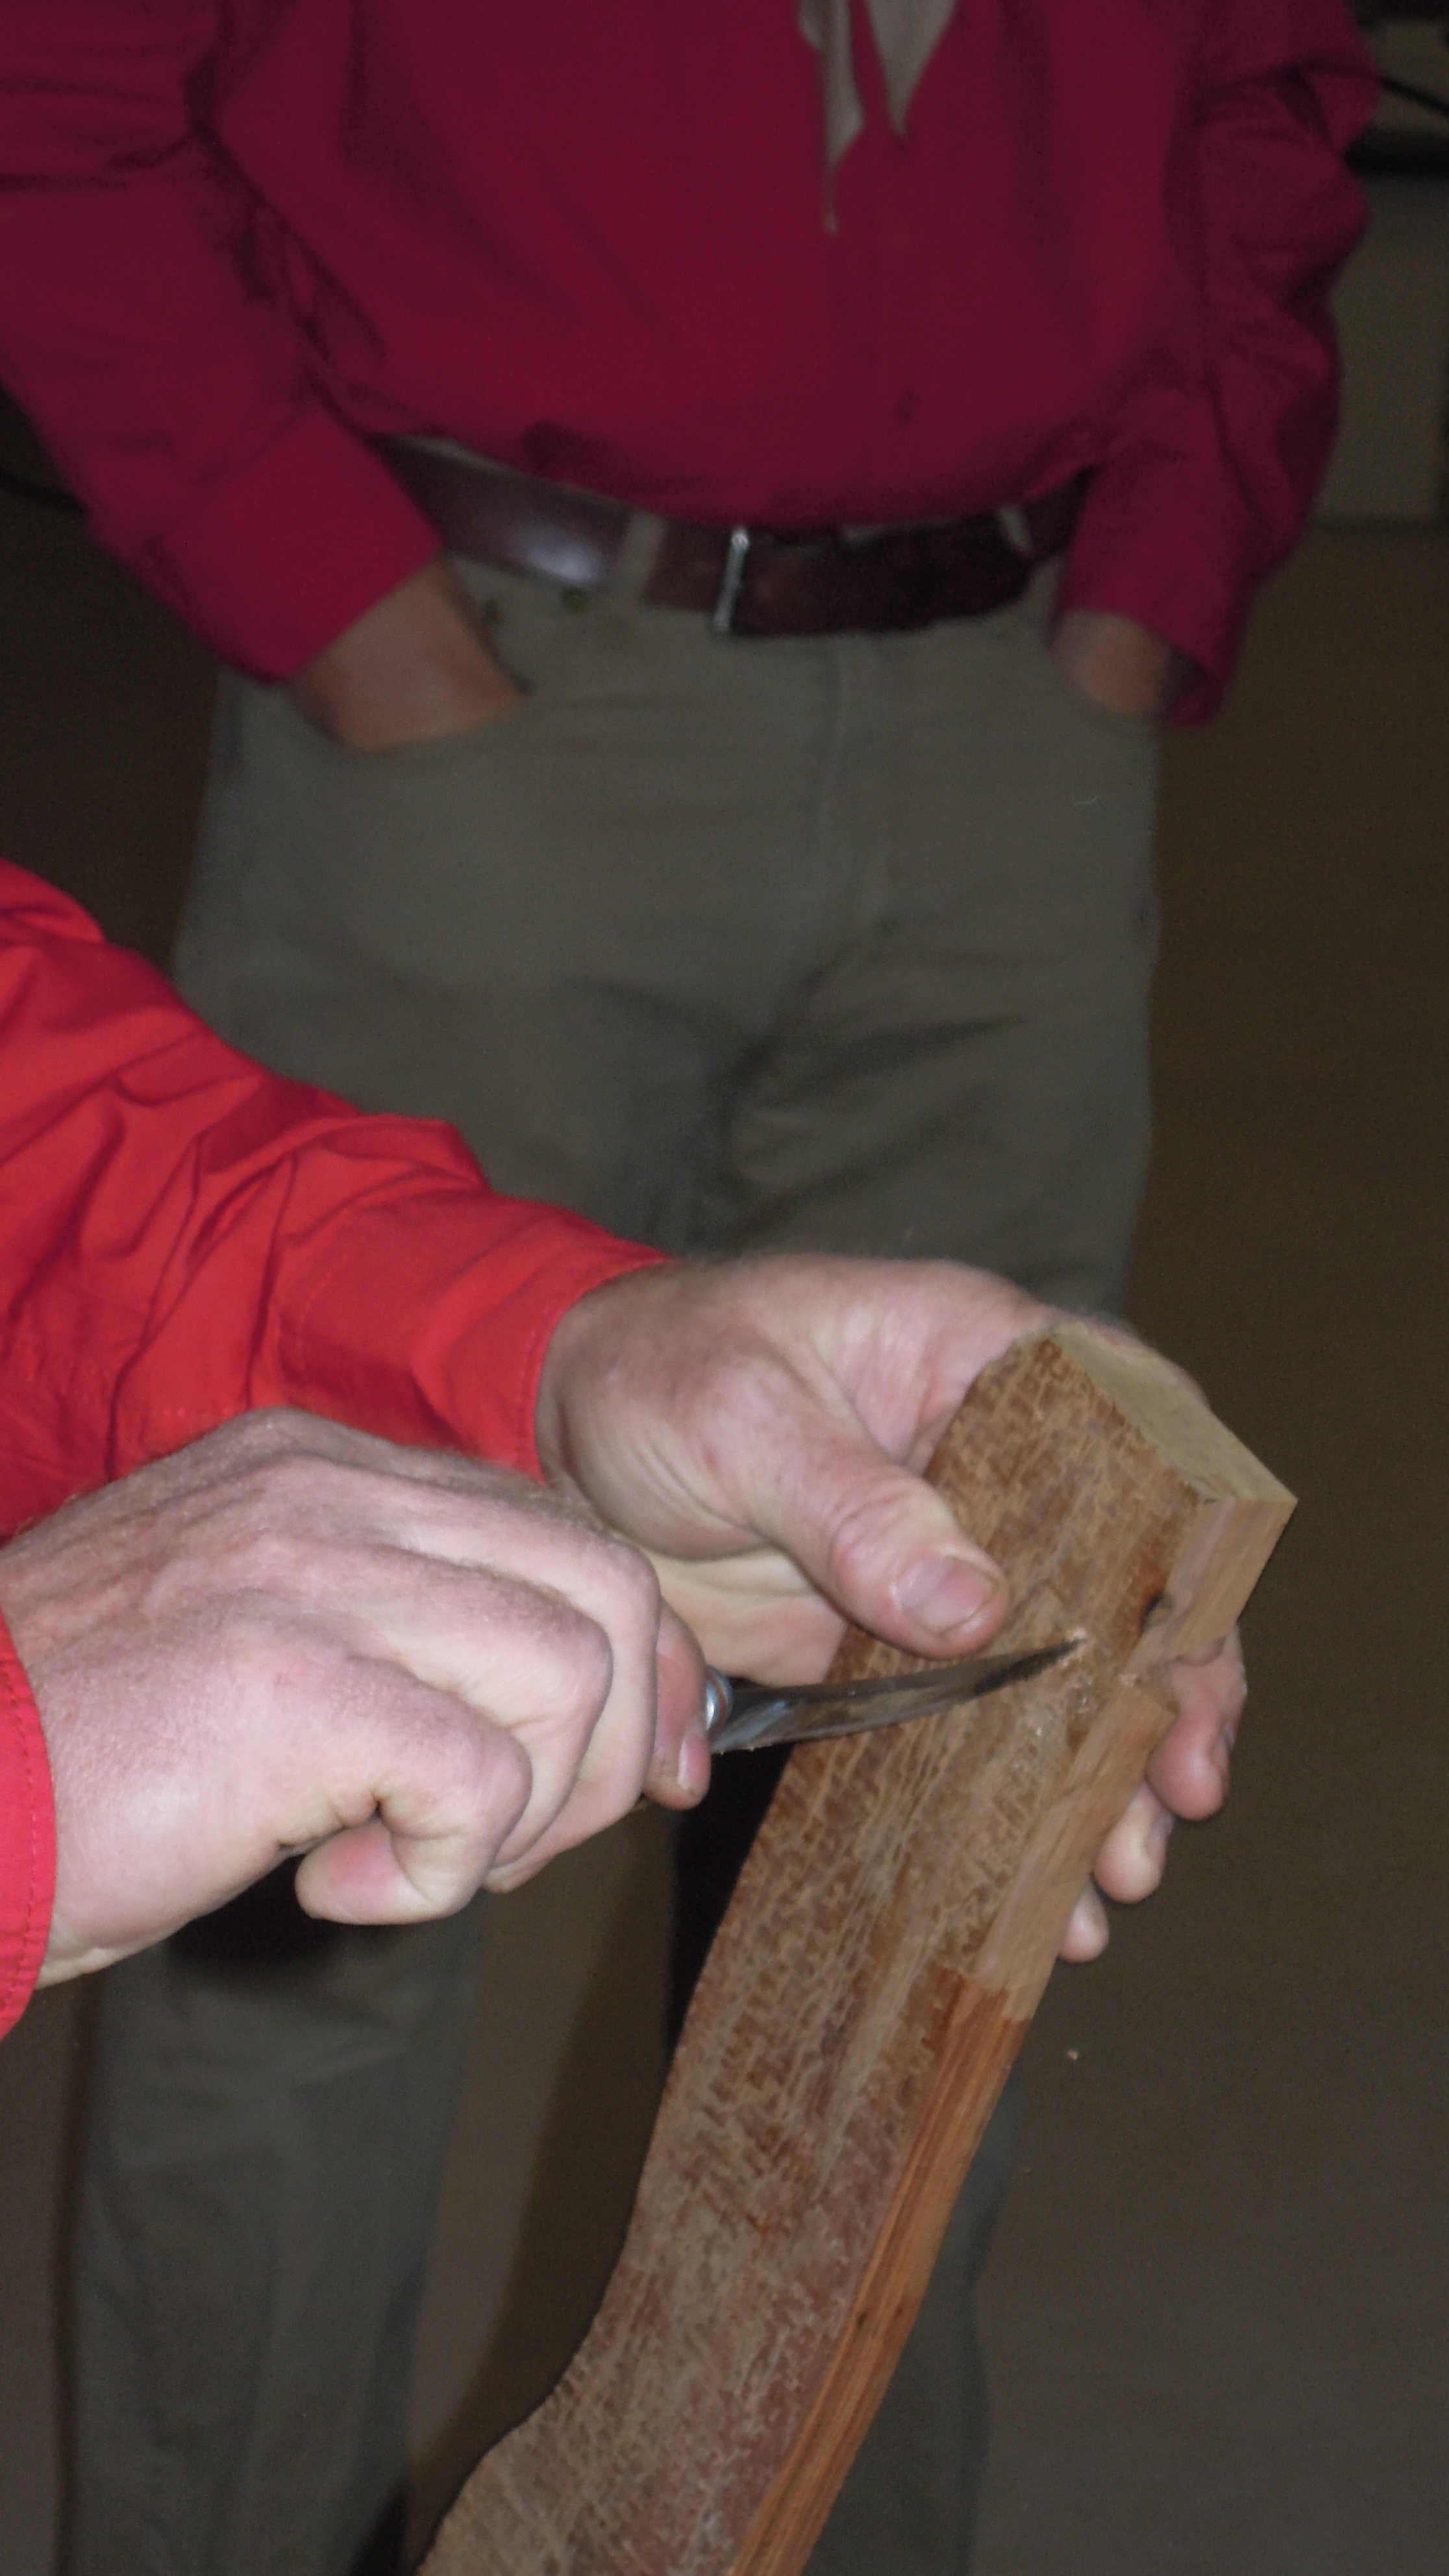
 Well there are a few more tricks to this. 1st the piece of wood needs to
be dry, no sap. then cut an angled v-notch in from the edge.
Well there are a few more tricks to this. 1st the piece of wood needs to
be dry, no sap. then cut an angled v-notch in from the edge. |
 Notice the current angle of his knife. Both sides of the V should go no
deeper than this.
Notice the current angle of his knife. Both sides of the V should go no
deeper than this. |
 This shows the finished notch. He made a few of these about an inch apart
as you may go through a few of these before one takes off and lights.
This shows the finished notch. He made a few of these about an inch apart
as you may go through a few of these before one takes off and lights. |
 Make a starter hole directly in line with your notch but in from the edge
a bit more than the thickness of your stick. It will be rubbings
it's way through into your notch, but if your too close to the edge
your stick will work out off the edge of the piece of wood.
Make a starter hole directly in line with your notch but in from the edge
a bit more than the thickness of your stick. It will be rubbings
it's way through into your notch, but if your too close to the edge
your stick will work out off the edge of the piece of wood. |
 Just need a small starter hole to keep the stick aligned with your
notch.
Just need a small starter hole to keep the stick aligned with your
notch. |
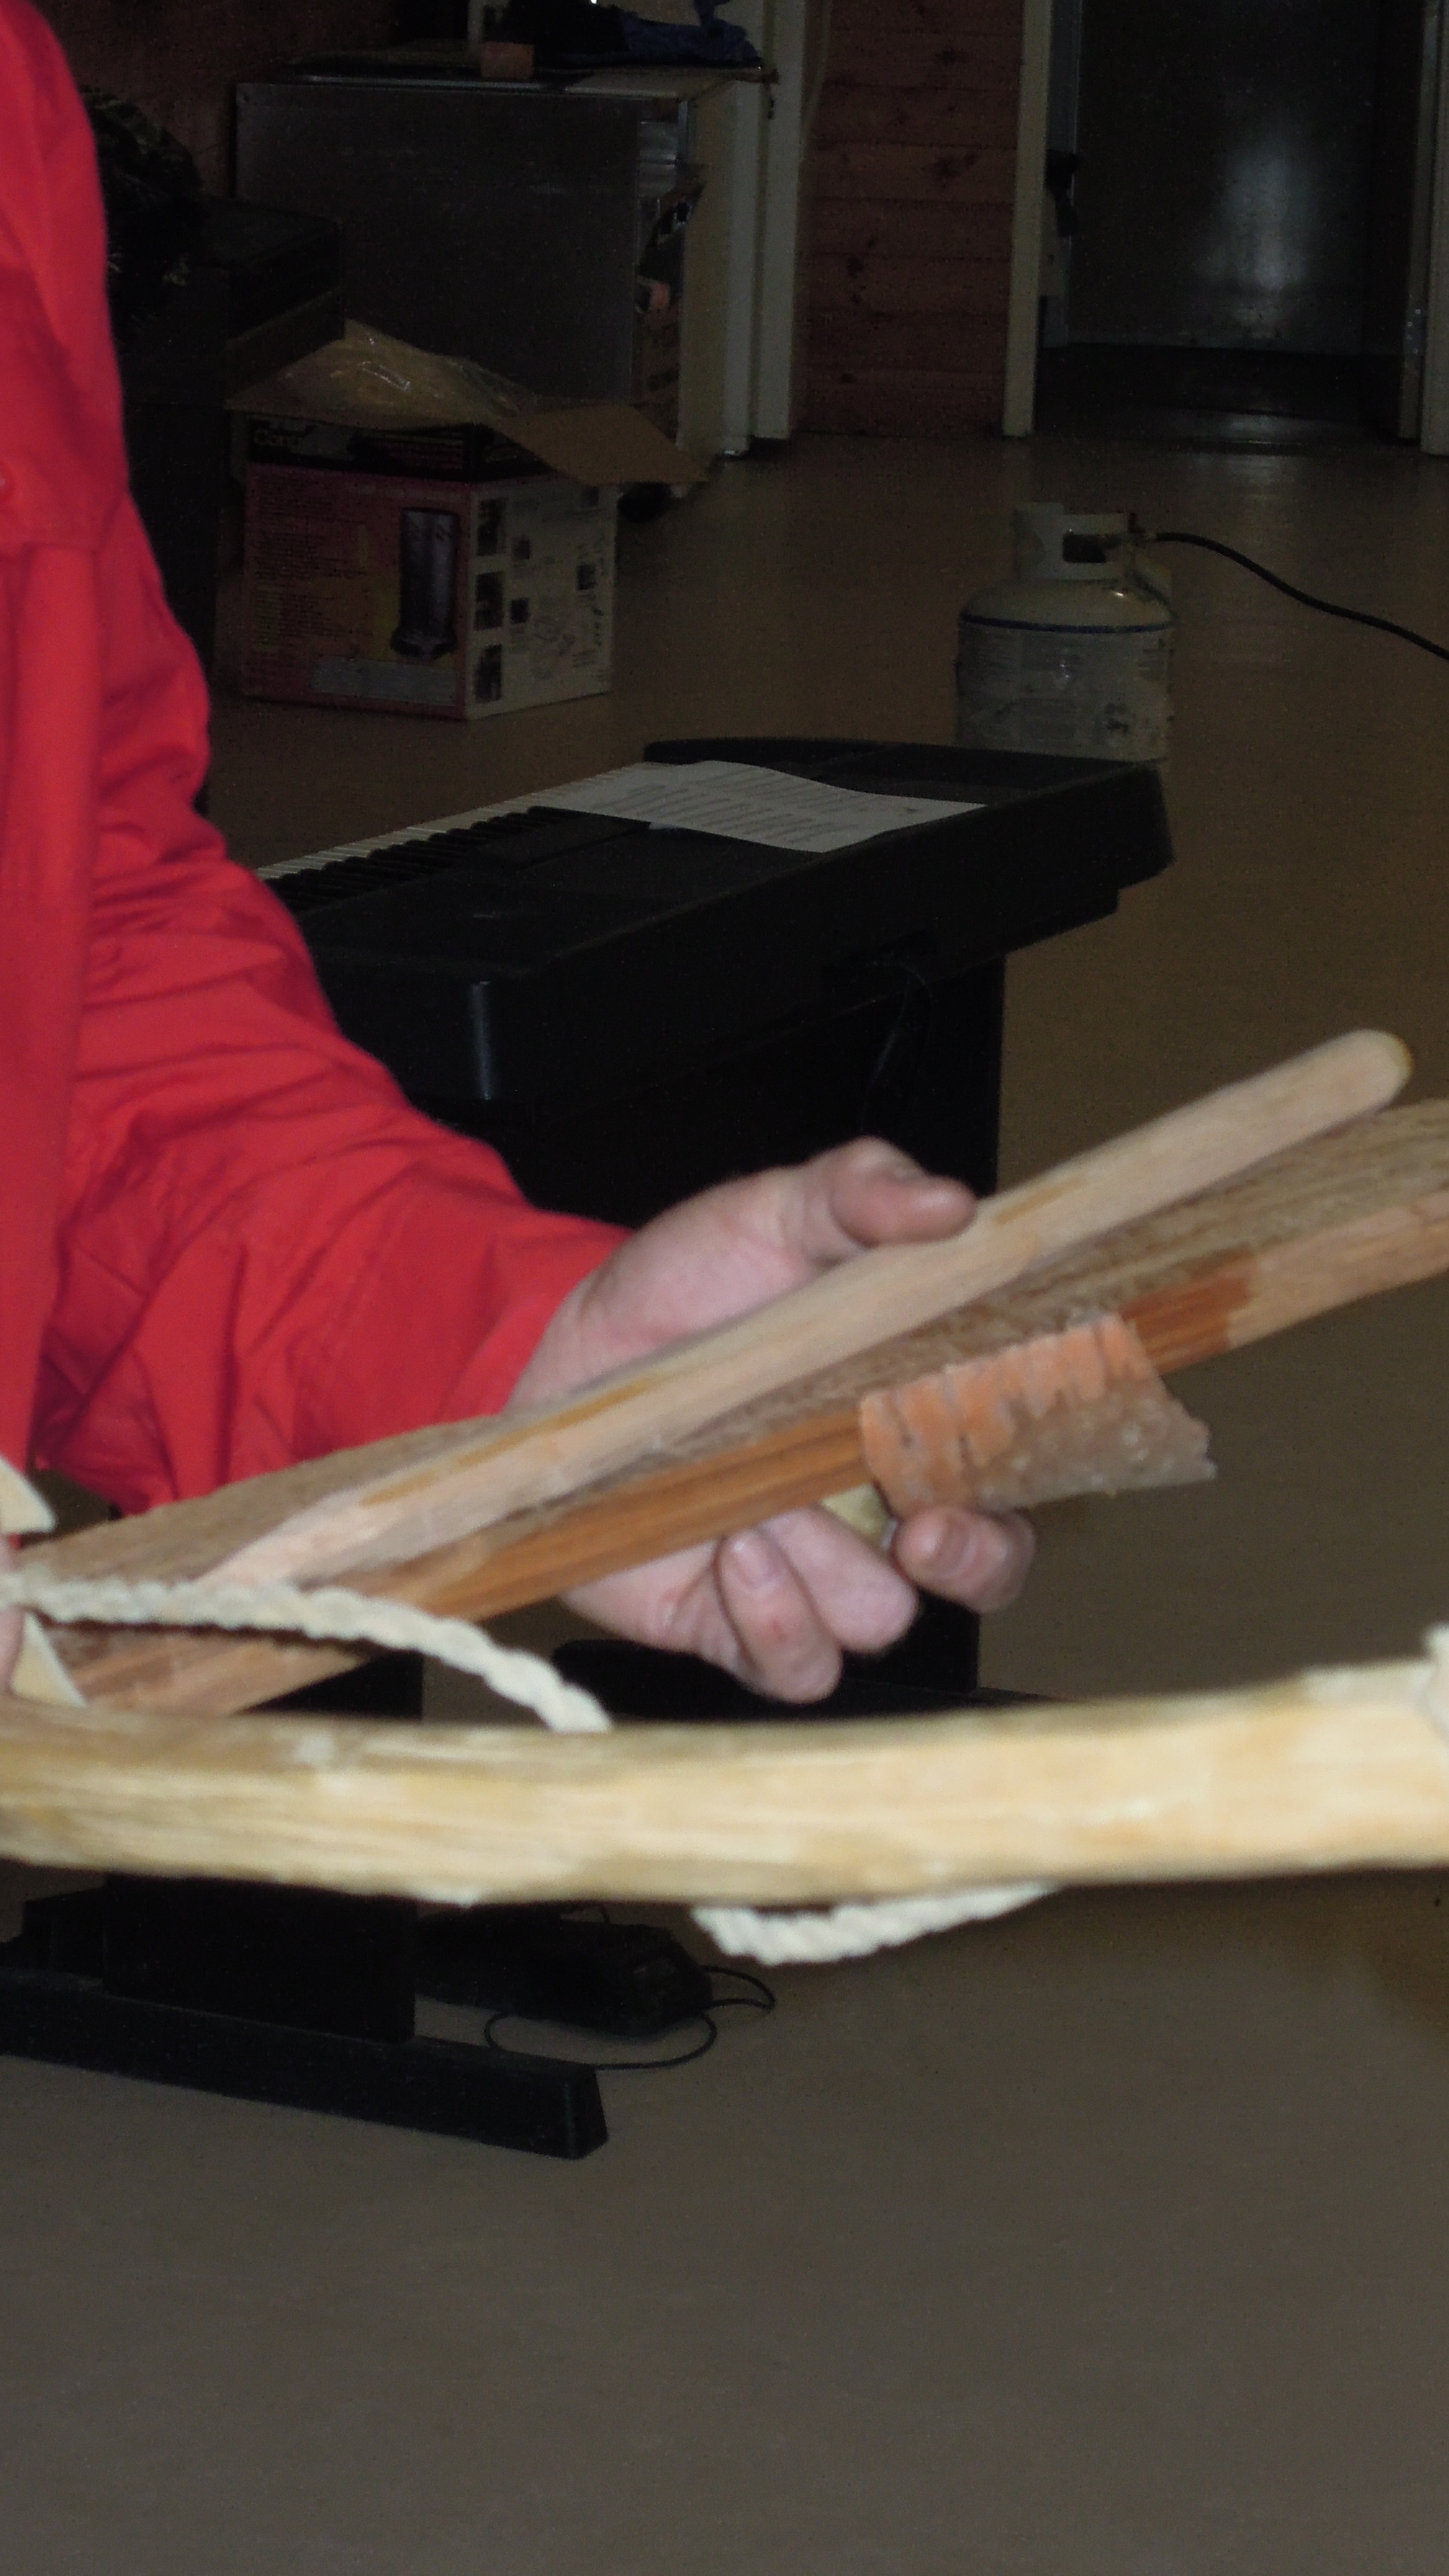 You will need a bow of sorts with a rope, and a thin piece of wood to act
as a plate to catch the hot fibers that get rubbed off. His was a piece of
birch bark. His rope was a couple twisted strands of rawhide.
You will need a bow of sorts with a rope, and a thin piece of wood to act
as a plate to catch the hot fibers that get rubbed off. His was a piece of
birch bark. His rope was a couple twisted strands of rawhide. |
 The stick was sharpened to a 45 degree point. He indicated the wood fibers
in the stick going the length of the stick would cross through the piece
of wood with its fibers at 90 degrees. This was important to get maximum
friction and produce the hot wood filings building up inside the notch.
The stick was sharpened to a 45 degree point. He indicated the wood fibers
in the stick going the length of the stick would cross through the piece
of wood with its fibers at 90 degrees. This was important to get maximum
friction and produce the hot wood filings building up inside the notch.
You can see he places the wood plate under the notch. |
 He then stepped on the piece of wood and got his bow ready. Notice
the bow was carved to keep the rope secure at the ends. A special knot at
the other end allow him to adjust the slack in the rope.
He then stepped on the piece of wood and got his bow ready. Notice
the bow was carved to keep the rope secure at the ends. A special knot at
the other end allow him to adjust the slack in the rope. |
 This is his stone socket used to allow the palm of his hand to press down
on the top of the stick. Keep your eye out next time you walk along a
rocky path or stream for a rock with a concave shape and maybe even a divot
inside it.
This is his stone socket used to allow the palm of his hand to press down
on the top of the stick. Keep your eye out next time you walk along a
rocky path or stream for a rock with a concave shape and maybe even a divot
inside it. |
 Got his foot on the piece of wood, bow wrapped around the stick, palm
pressing down on stick with socket stone, and the stick placed into the
starter hole.
Got his foot on the piece of wood, bow wrapped around the stick, palm
pressing down on stick with socket stone, and the stick placed into the
starter hole. |
 And now we are starting to see smoke.
 |
 Here you can see the friction enlarged the hole quite quickly and the
rubbings on top are similar to those that drop down the notch onto the
plate.
Here you can see the friction enlarged the hole quite quickly and the
rubbings on top are similar to those that drop down the notch onto the
plate. |
 Bad focus pic, but you can see hole starting to expose the v-notch. Bit of
light shining through.
Bad focus pic, but you can see hole starting to expose the v-notch. Bit of
light shining through. |
 Good shot showing the buildup of rubbings inside the notch on top of
the wooden plate.
Good shot showing the buildup of rubbings inside the notch on top of
the wooden plate. |
 Object is to build up a small pile of hot rubbings on the plate.
 |
 If you rub through before you get a hot enough pile, start on the next
v-notch and repeat the process.
If you rub through before you get a hot enough pile, start on the next
v-notch and repeat the process. |
 Make a fresh tip on your stick.
 |
 May need to adjust the slack in the rope as well.
 |
 Doing this one outside. and everything is set to go.
 |
 Getting some heat now.
 |
 Video - it's a lot of work...(720mb)
 |
 Video - Another one fizzles out. (76mb)
 |
 Video - It finally bursts into flames...(700mb).
Once you get a good pile of hot rubbings and can see some glow, pull the plate out and gently to blow to build up the heat. then pour them into your nest of dried fuel and continue to blow until the nest starts on fire. |
| Care of Sharpening of Saws, axes & knives | |||
 How to sharpen an axe.
 |
 A few sharpening tools...
 |
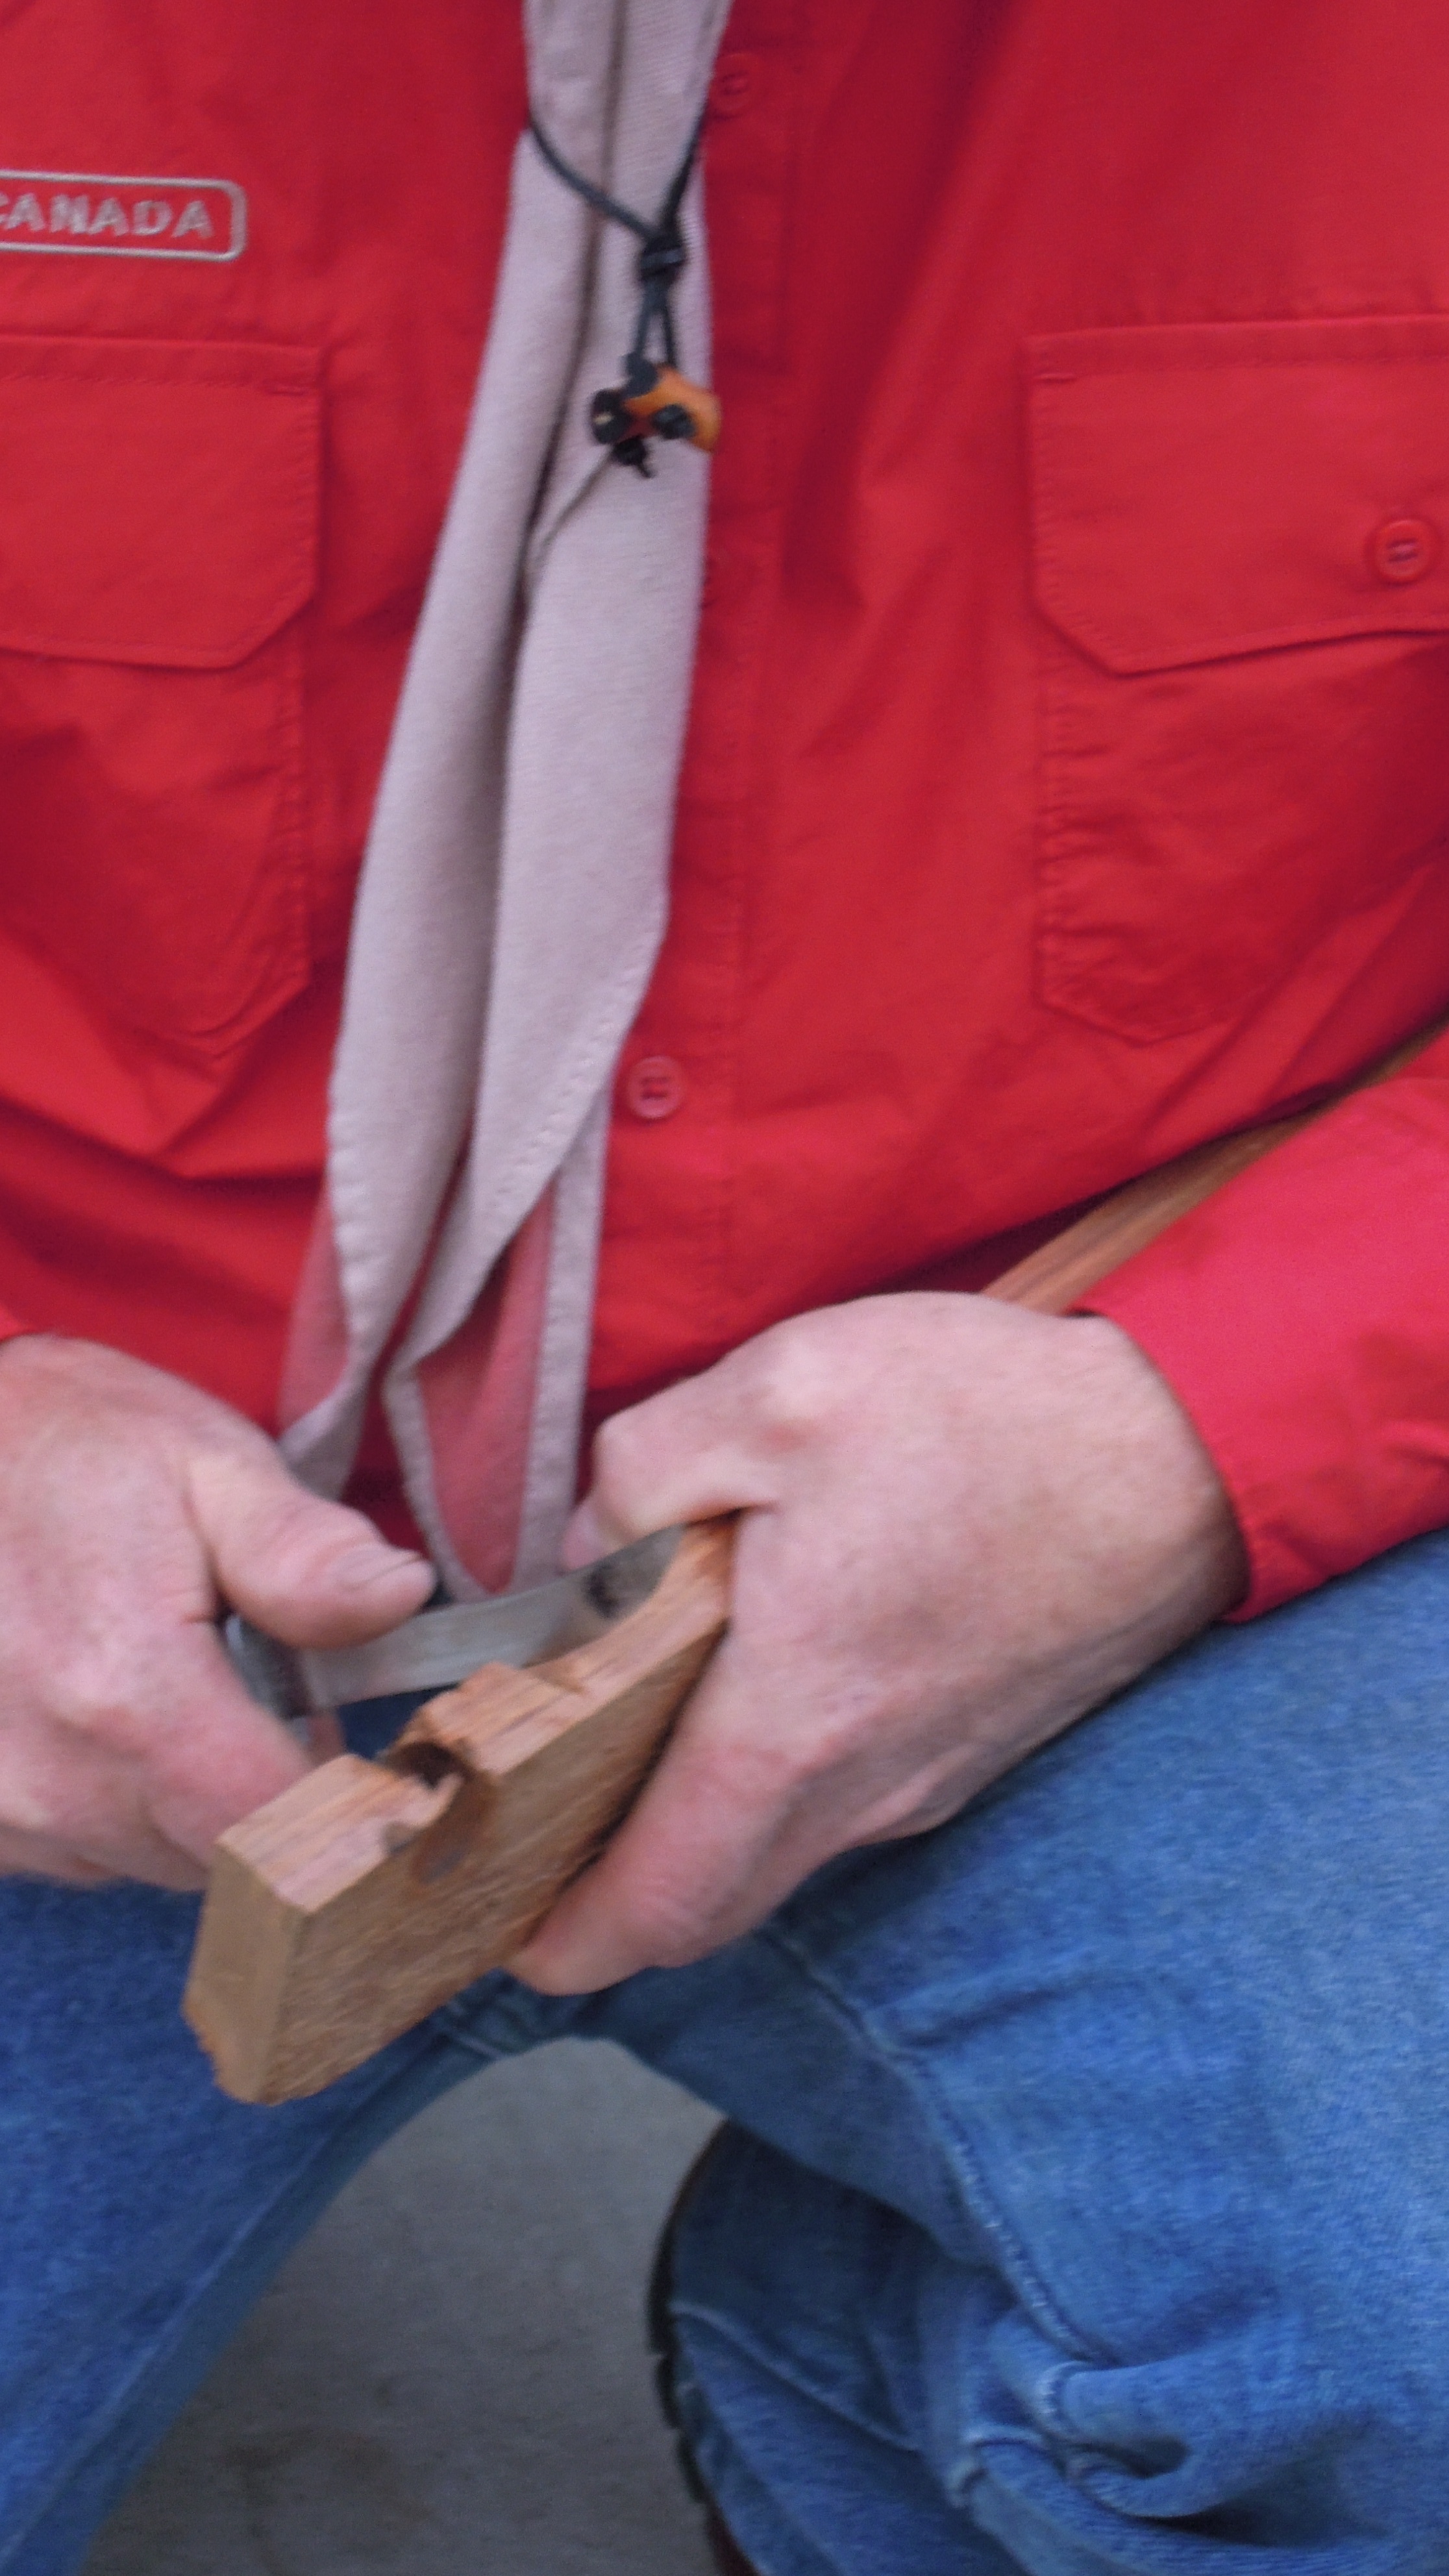
 Personally I prefer an axe over a pocket knife if I'm lost in the woods.
It's a hammer, axe, allows for a lot more strength transfer, extends your
reach etc.
Personally I prefer an axe over a pocket knife if I'm lost in the woods.
It's a hammer, axe, allows for a lot more strength transfer, extends your
reach etc. |
 I could shave with this now...
 |
 If you need to skin your dinner these hones will keep an excellent edge on
your knifes or even an axe.
If you need to skin your dinner these hones will keep an excellent edge on
your knifes or even an axe. |
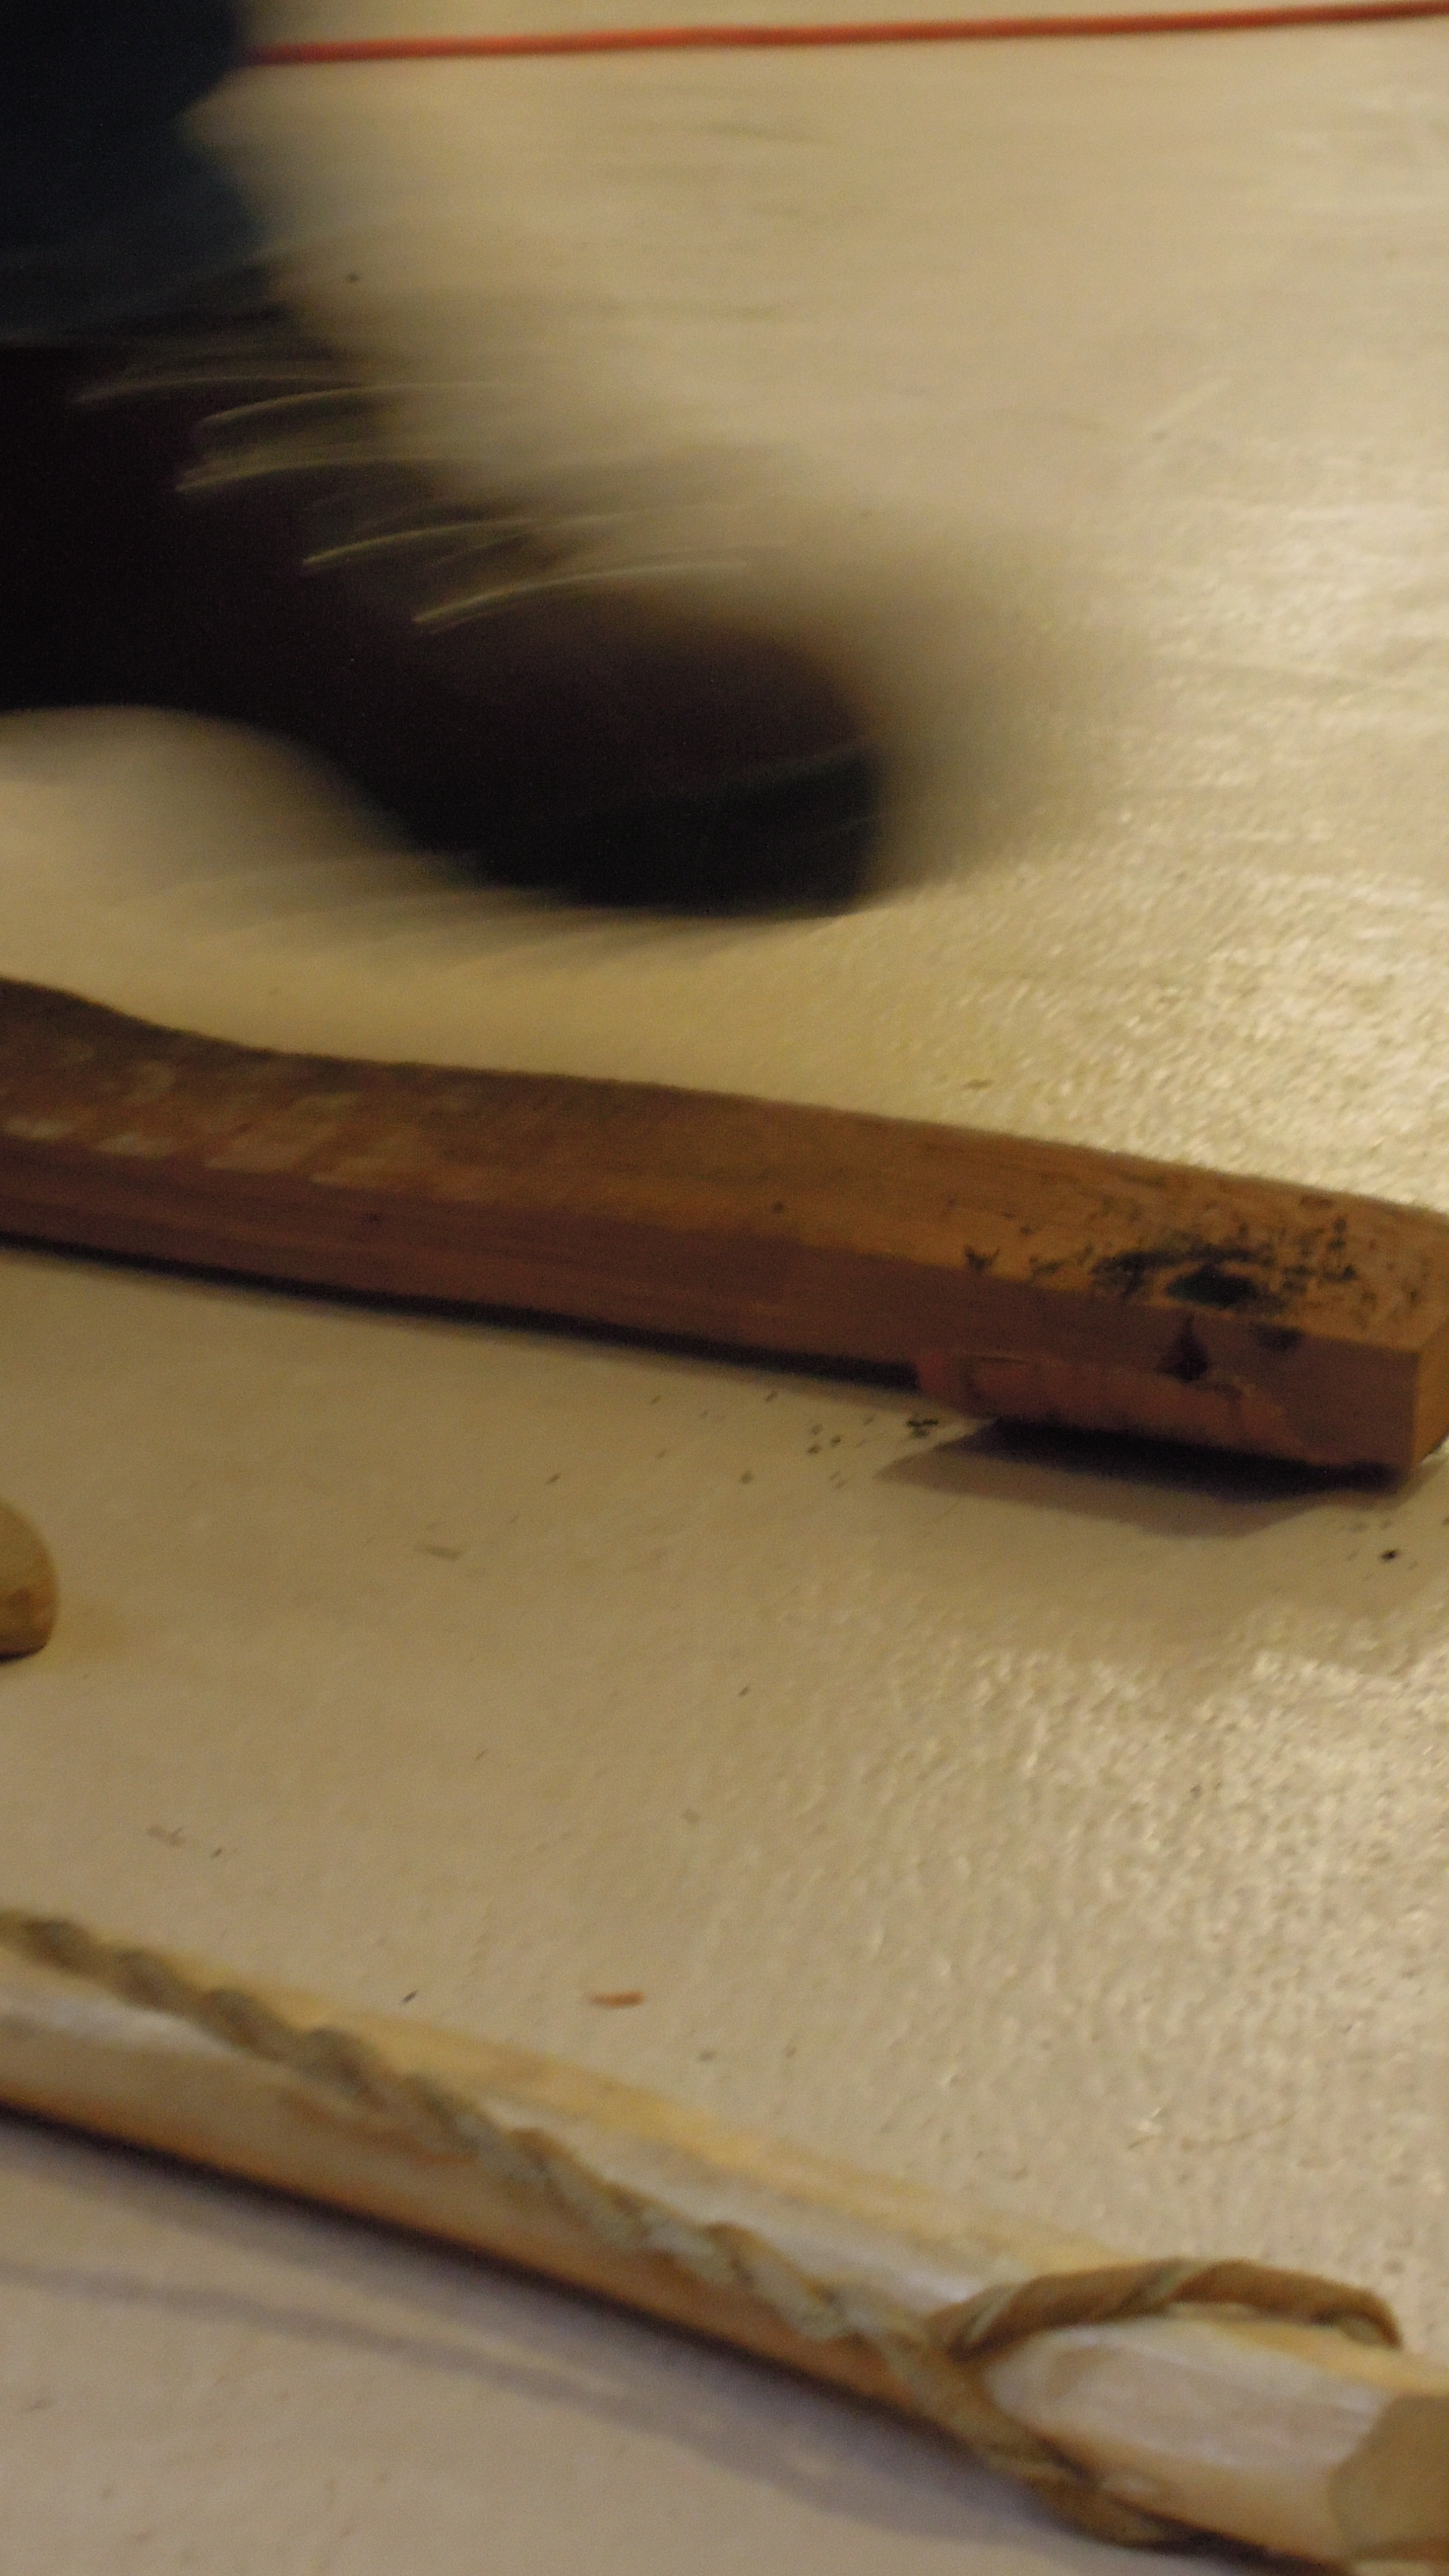
 Great saw to have but awkward to pack. Storage should be dry. They do make
files to sharpen these blades. A short piece of garden hose with a slit
make a nice protective shield for the blade.
Great saw to have but awkward to pack. Storage should be dry. They do make
files to sharpen these blades. A short piece of garden hose with a slit
make a nice protective shield for the blade. |
||
| Cooking stoves | |||
 One of the Shipley brothers checking out the fancy light weight equipment.
 |
 That stove is way to clean to be a scout camp stove.
 |
 The next generation Coleman stove. Still all the same mechanical failure
points but smaller. No problem cooking at below -20 though.
The next generation Coleman stove. Still all the same mechanical failure
points but smaller. No problem cooking at below -20 though. |
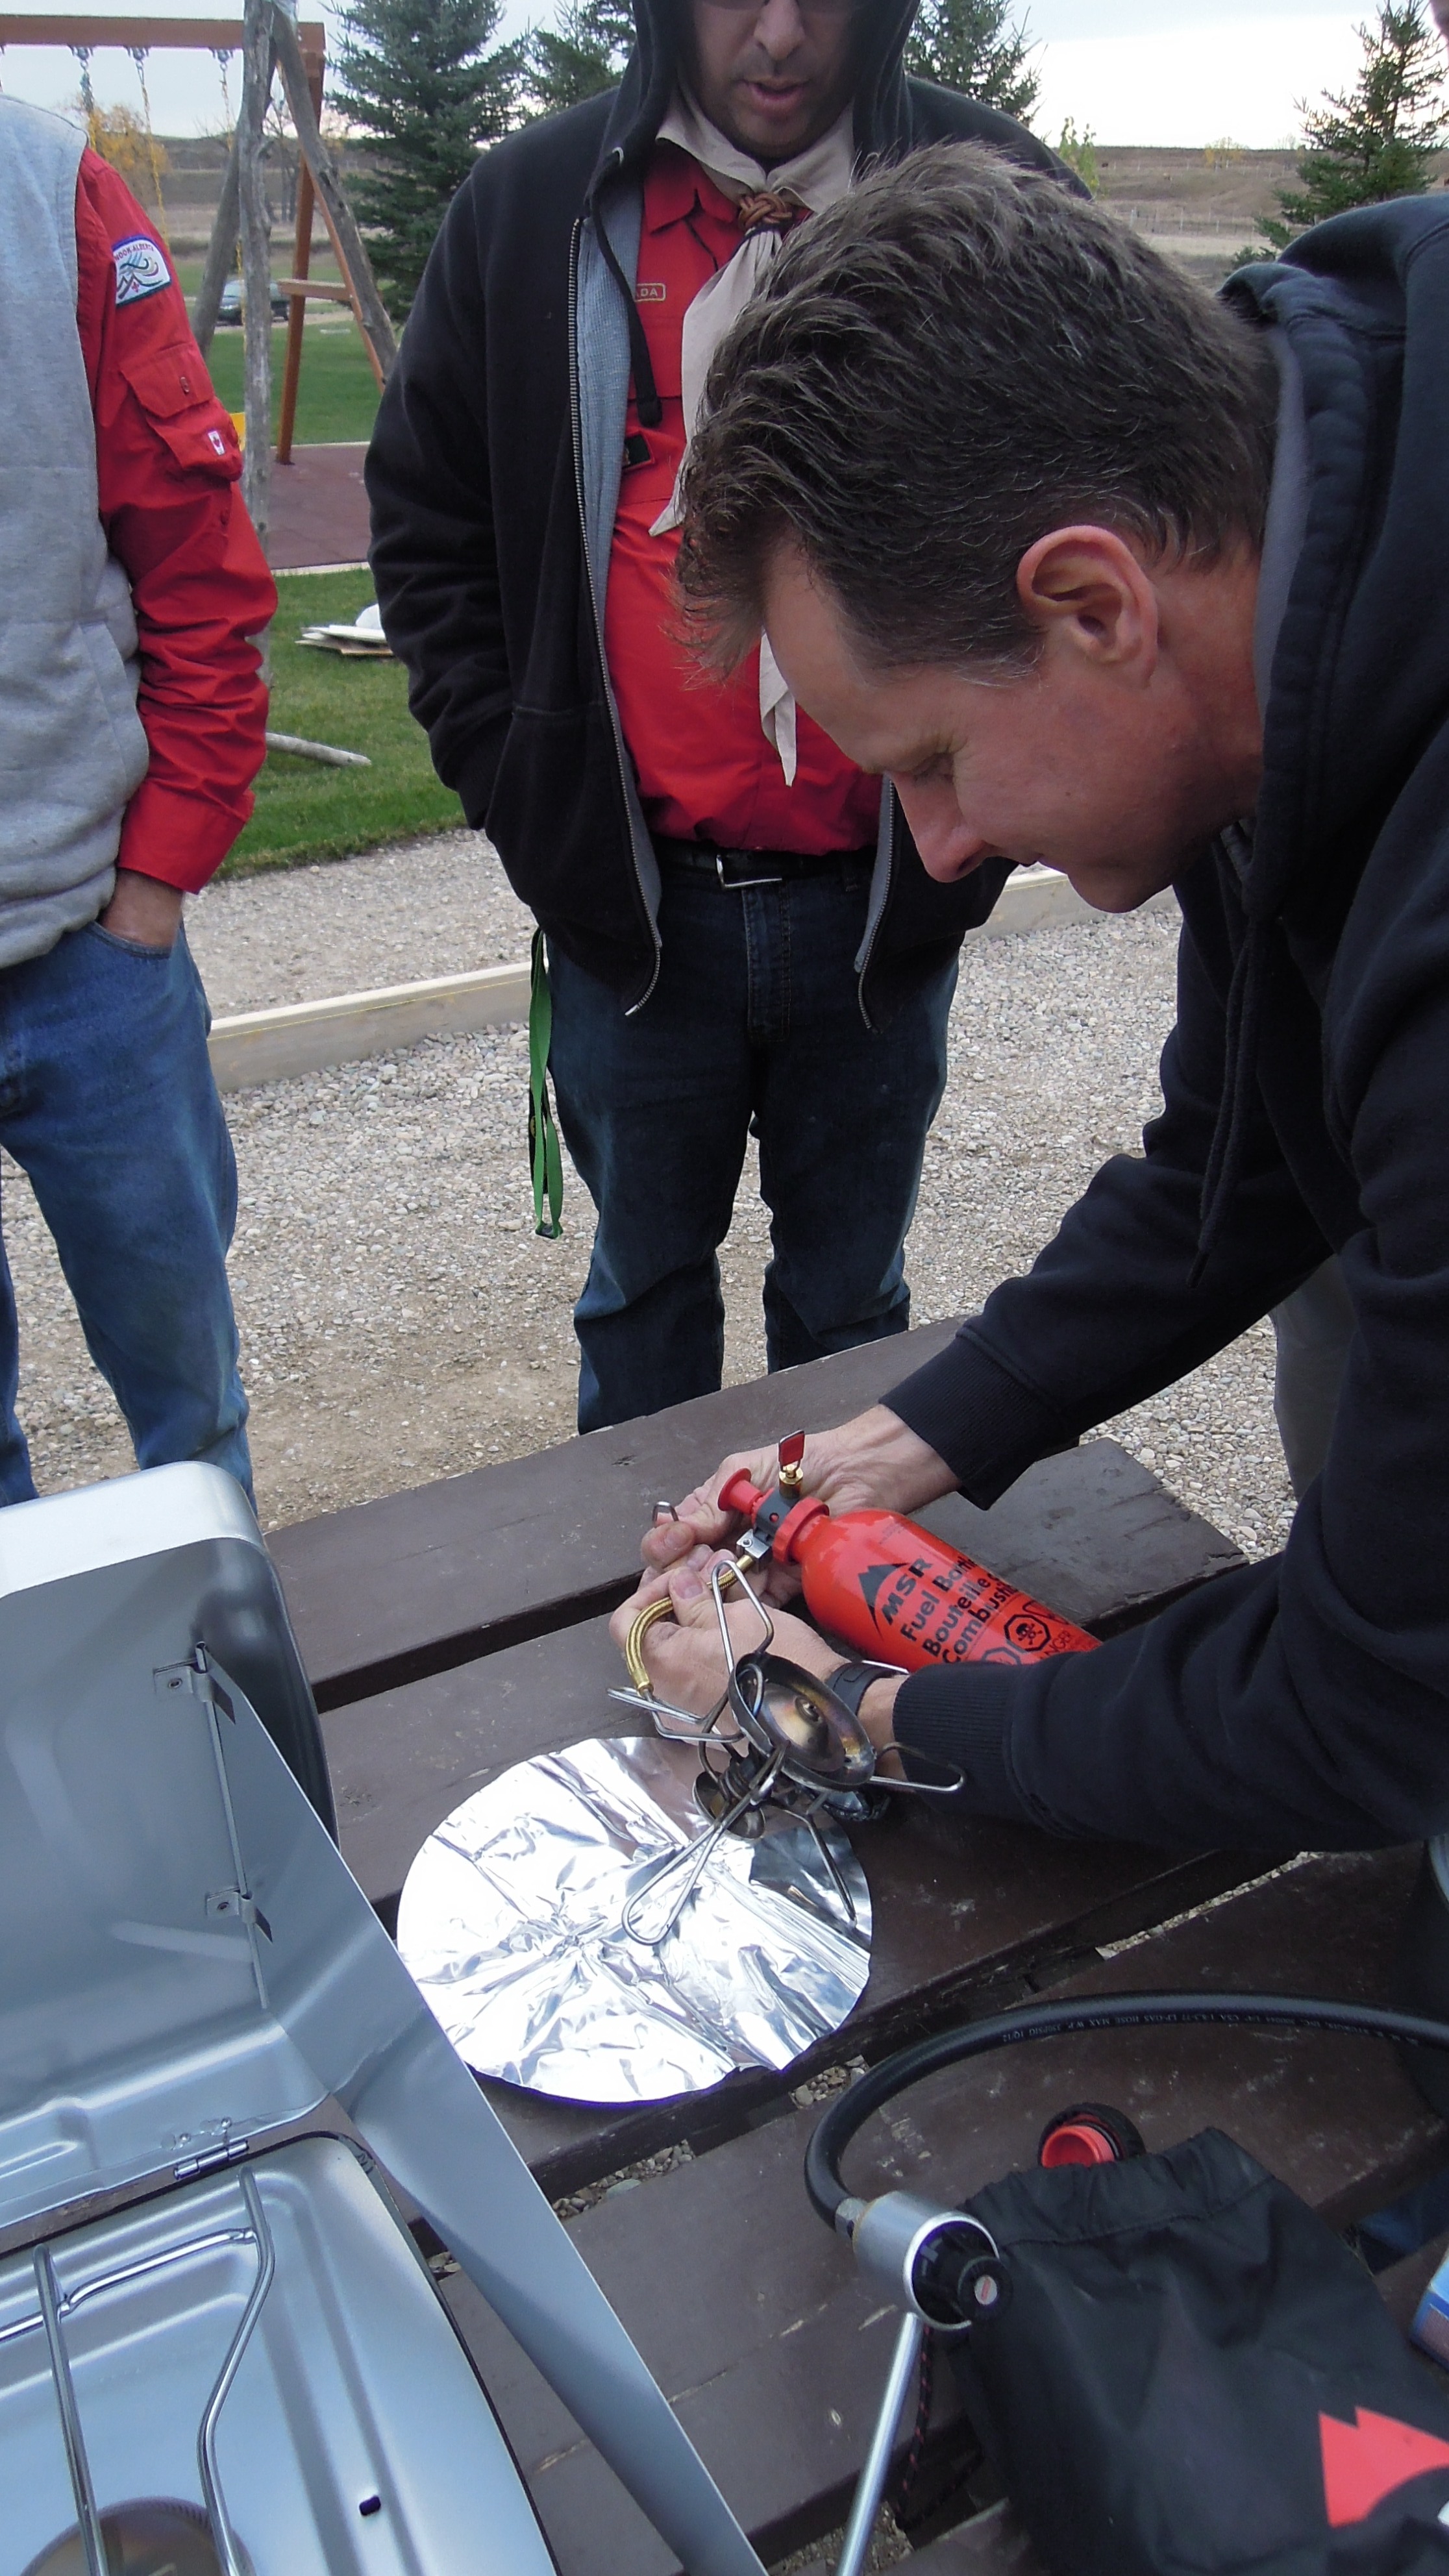
 Setup the heat shield.
 |
 Fill the bottom little dish with raw fuel. Then try lighting the fuel.
 |
 That parts burning, now just wait till it heats up the rest of the fuel
delivery system.
That parts burning, now just wait till it heats up the rest of the fuel
delivery system. |
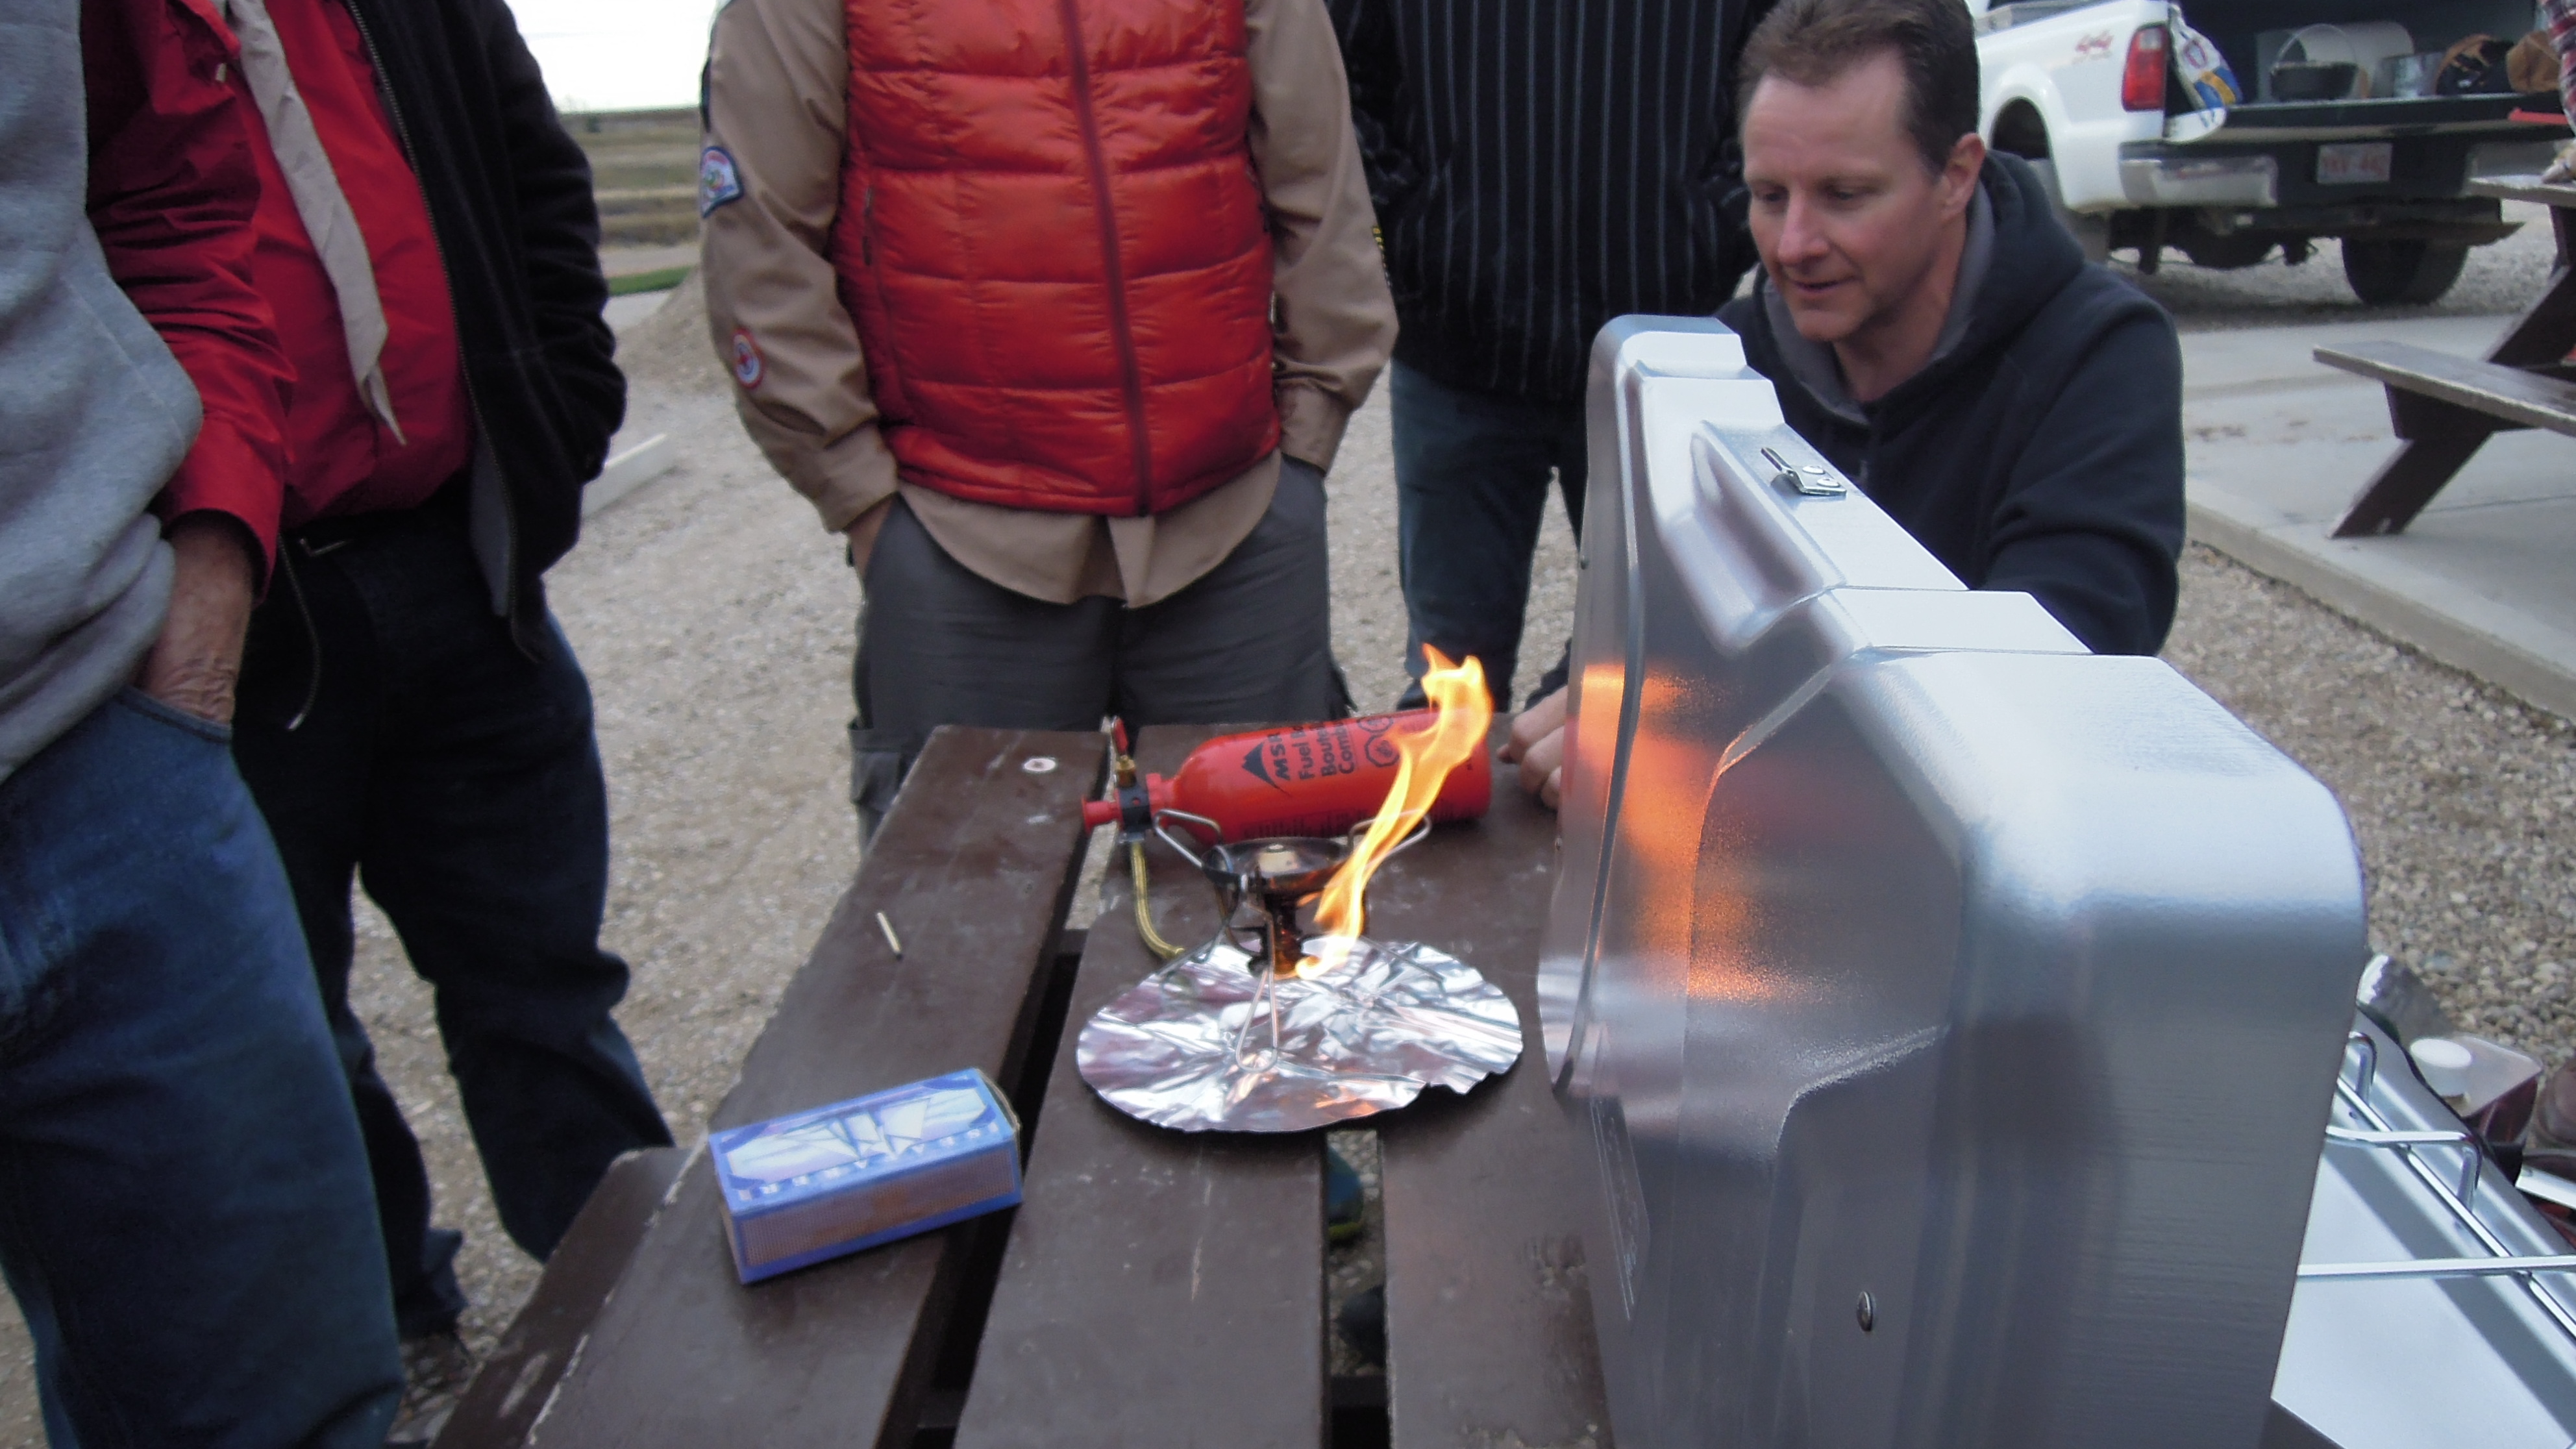
 There you have it, the blue flame.
 |
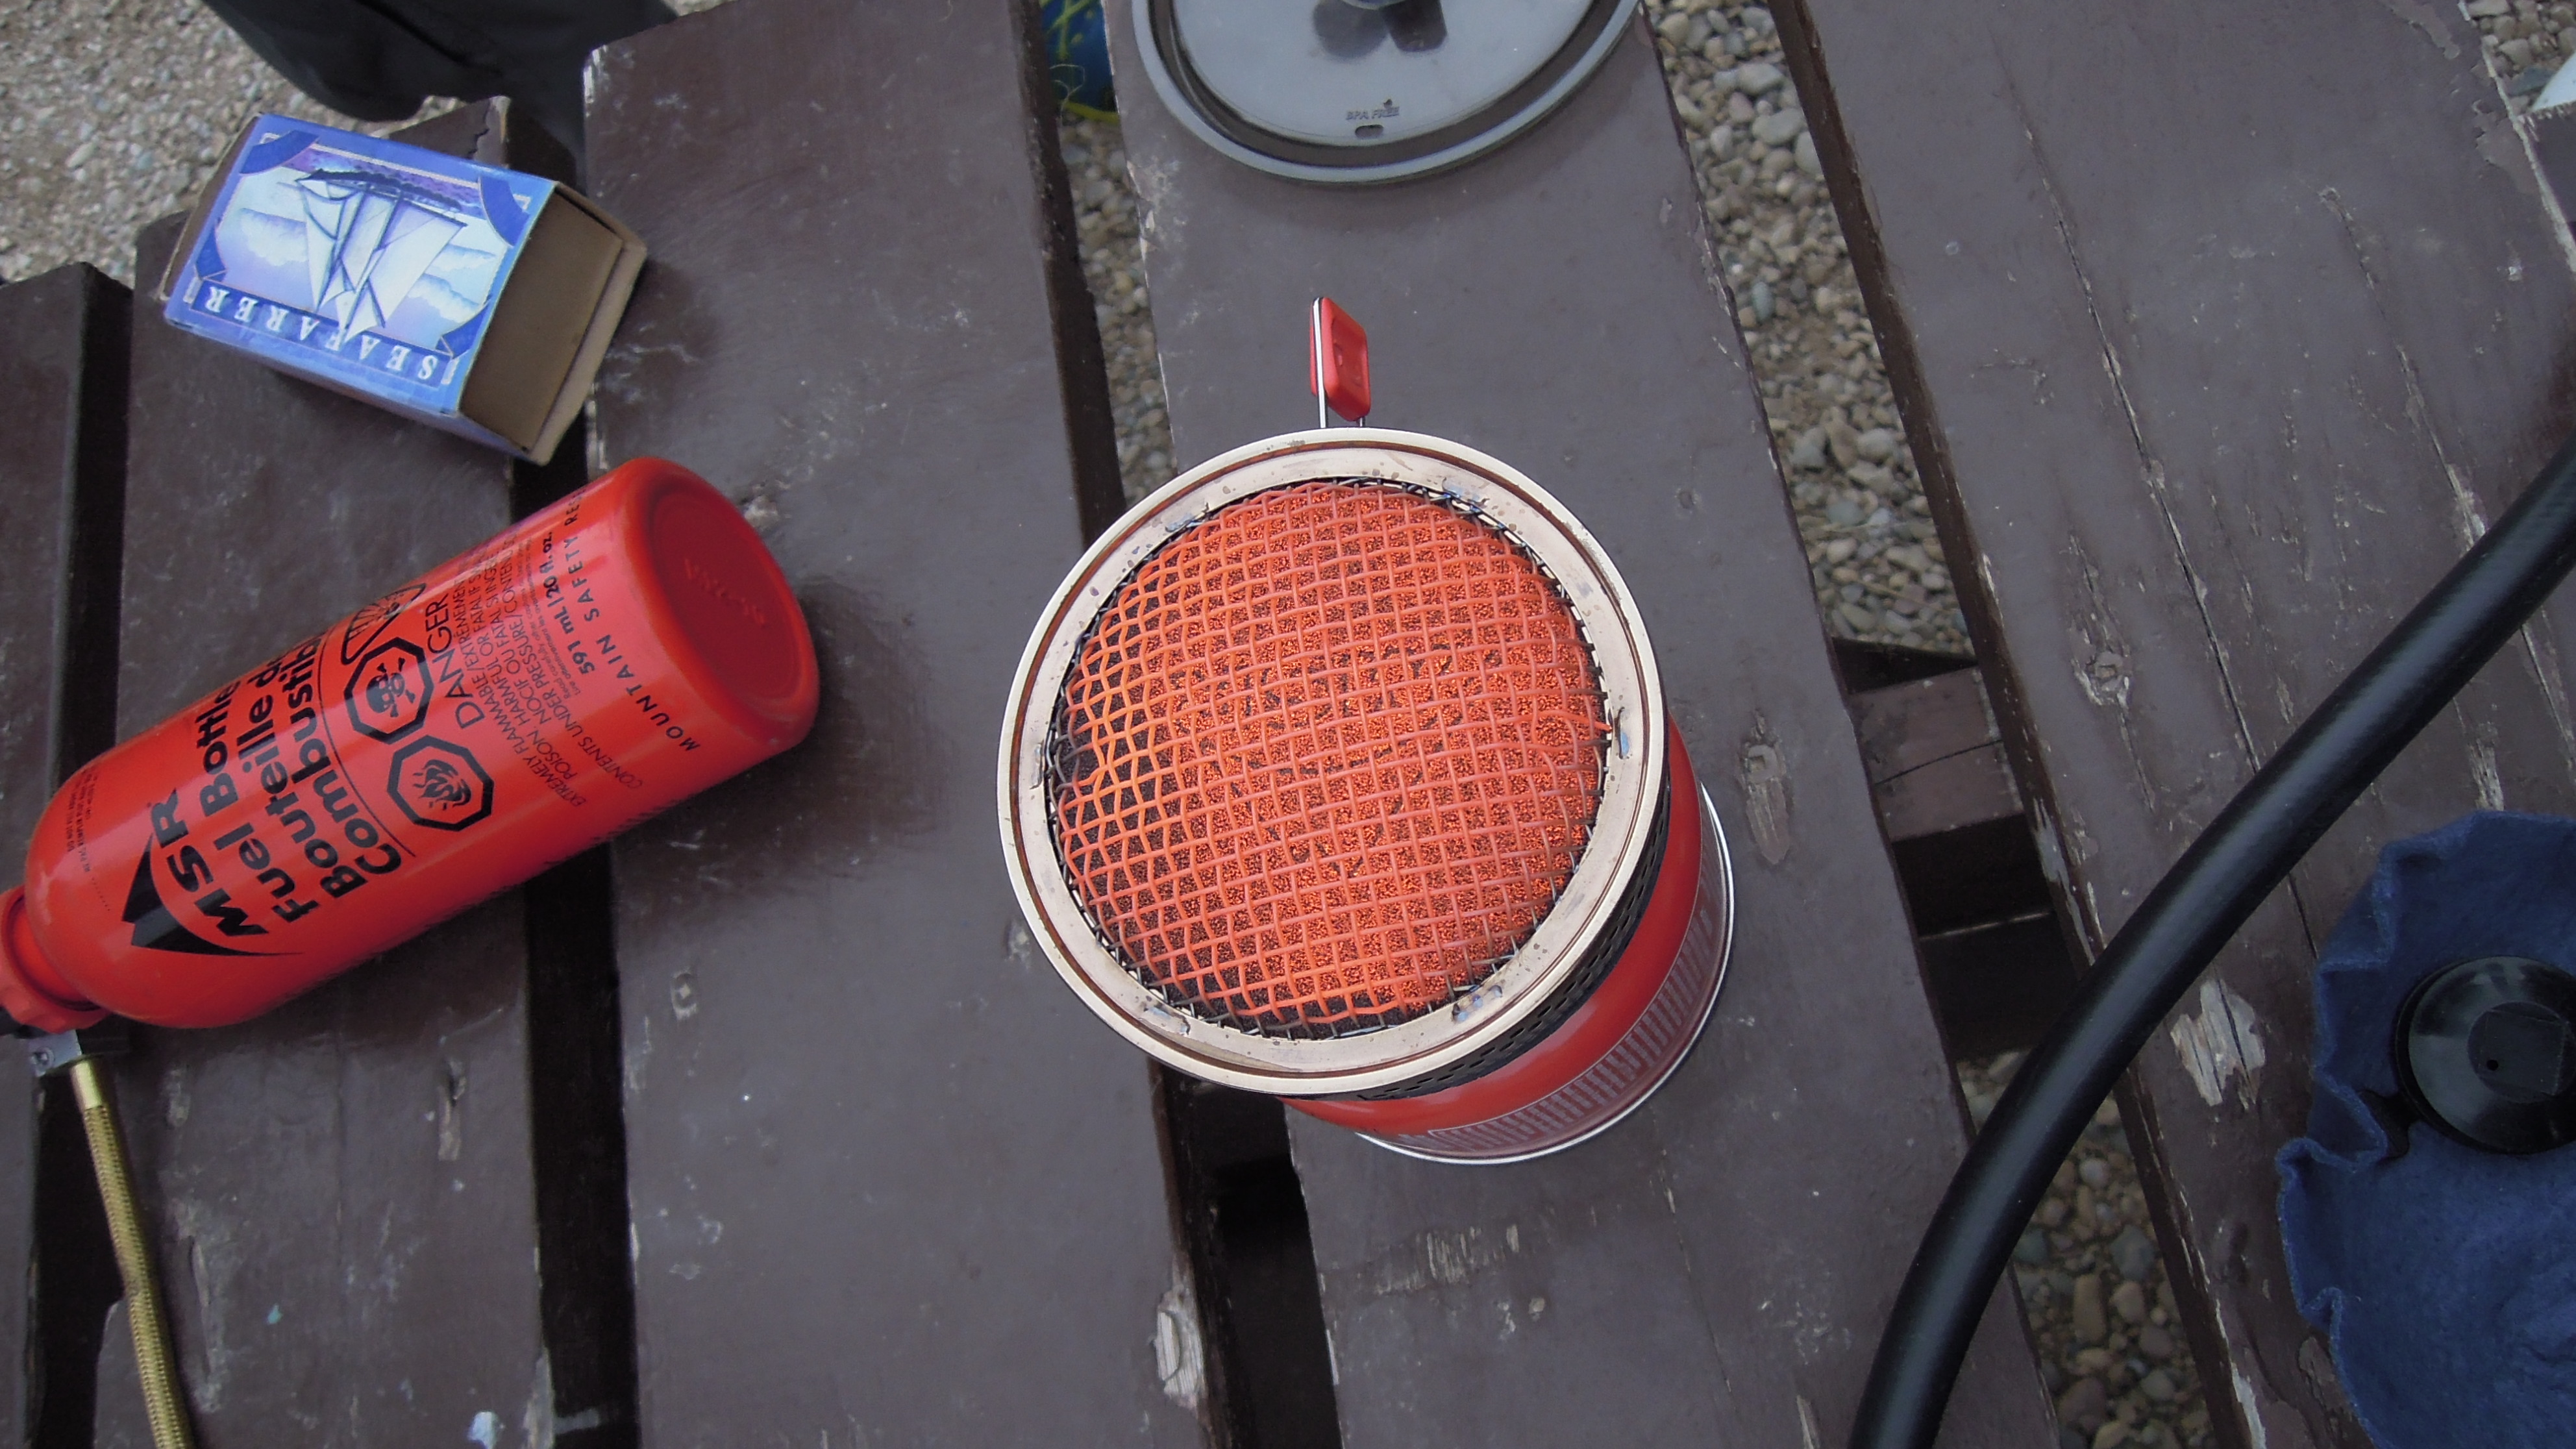 The new "all in one" disposable. trick is to know if there's
enough fuel left for the current hike.
The new "all in one" disposable. trick is to know if there's
enough fuel left for the current hike. |
 A home made pop-can stove. burns alcohol.
 |
 You make a heat shield as well.
 |
 Can't even see the flame.
 |
 Put the pot right on top and the holes allow the flames to spread over the
bottom.
Put the pot right on top and the holes allow the flames to spread over the
bottom. |
| Gourmet cooking with a Dutch Oven | |||
 Gourmet hash.
 |
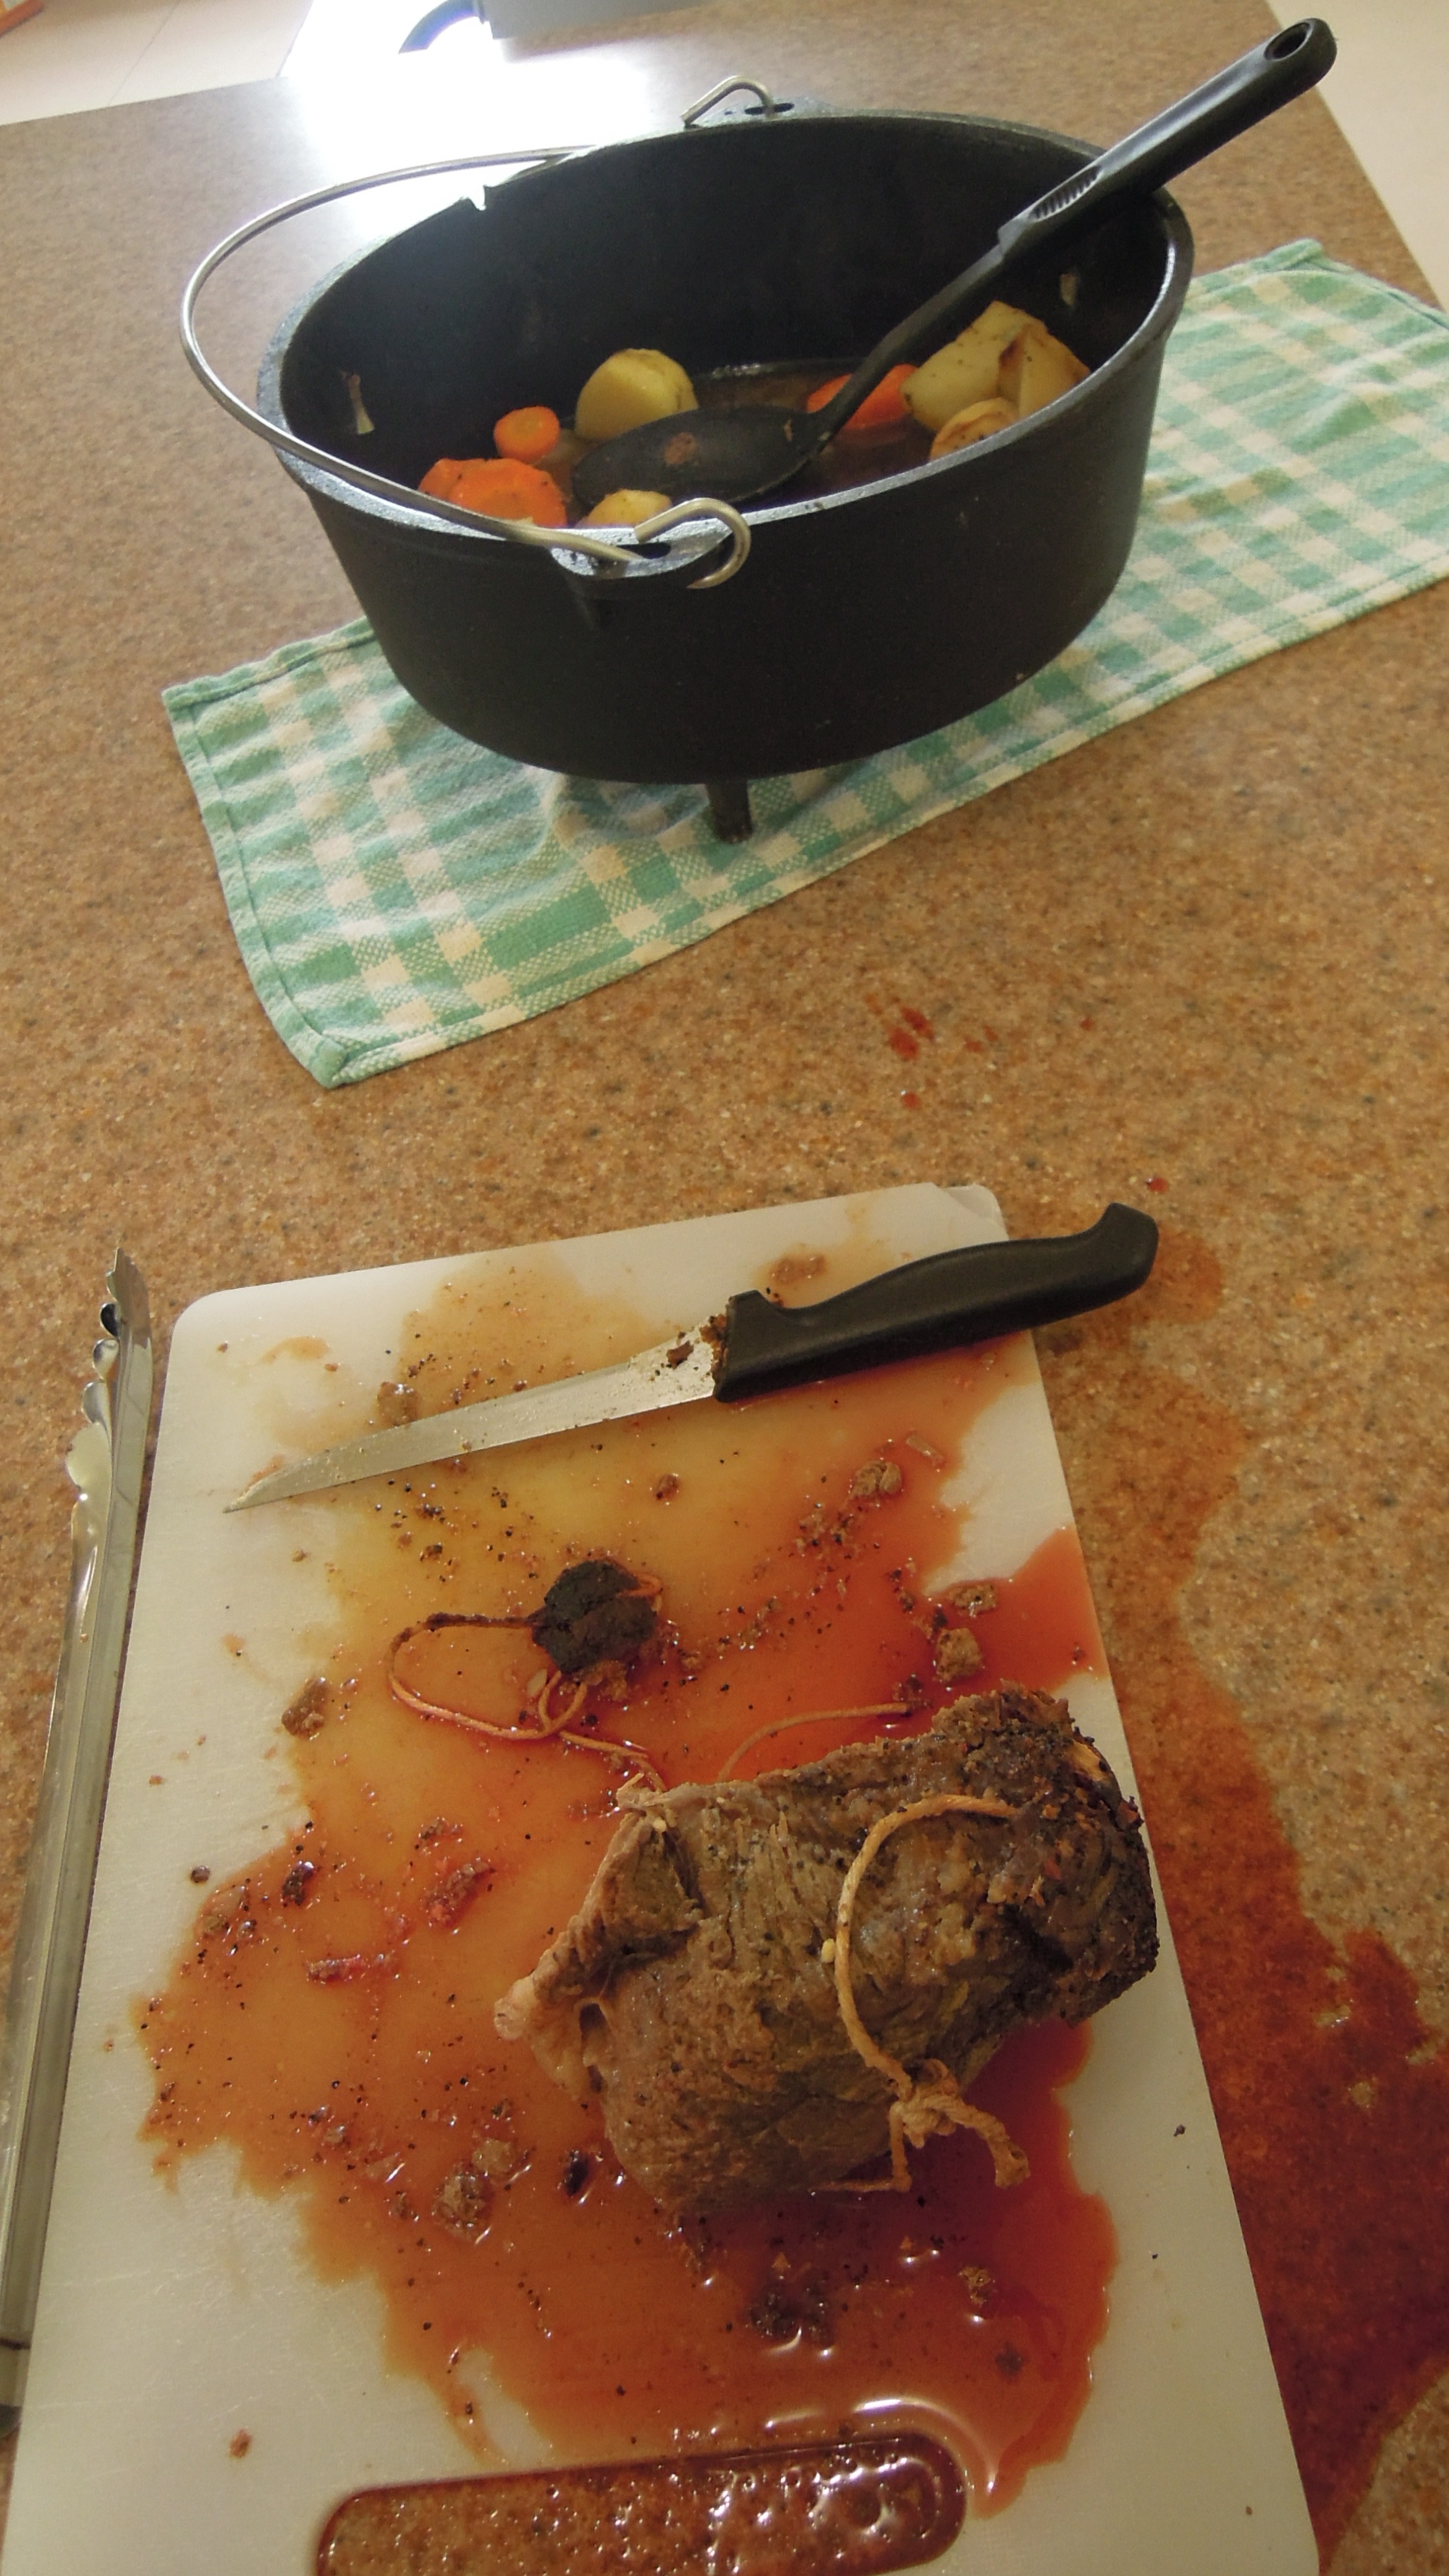 Perfect pot roast done to medium rare.
 |
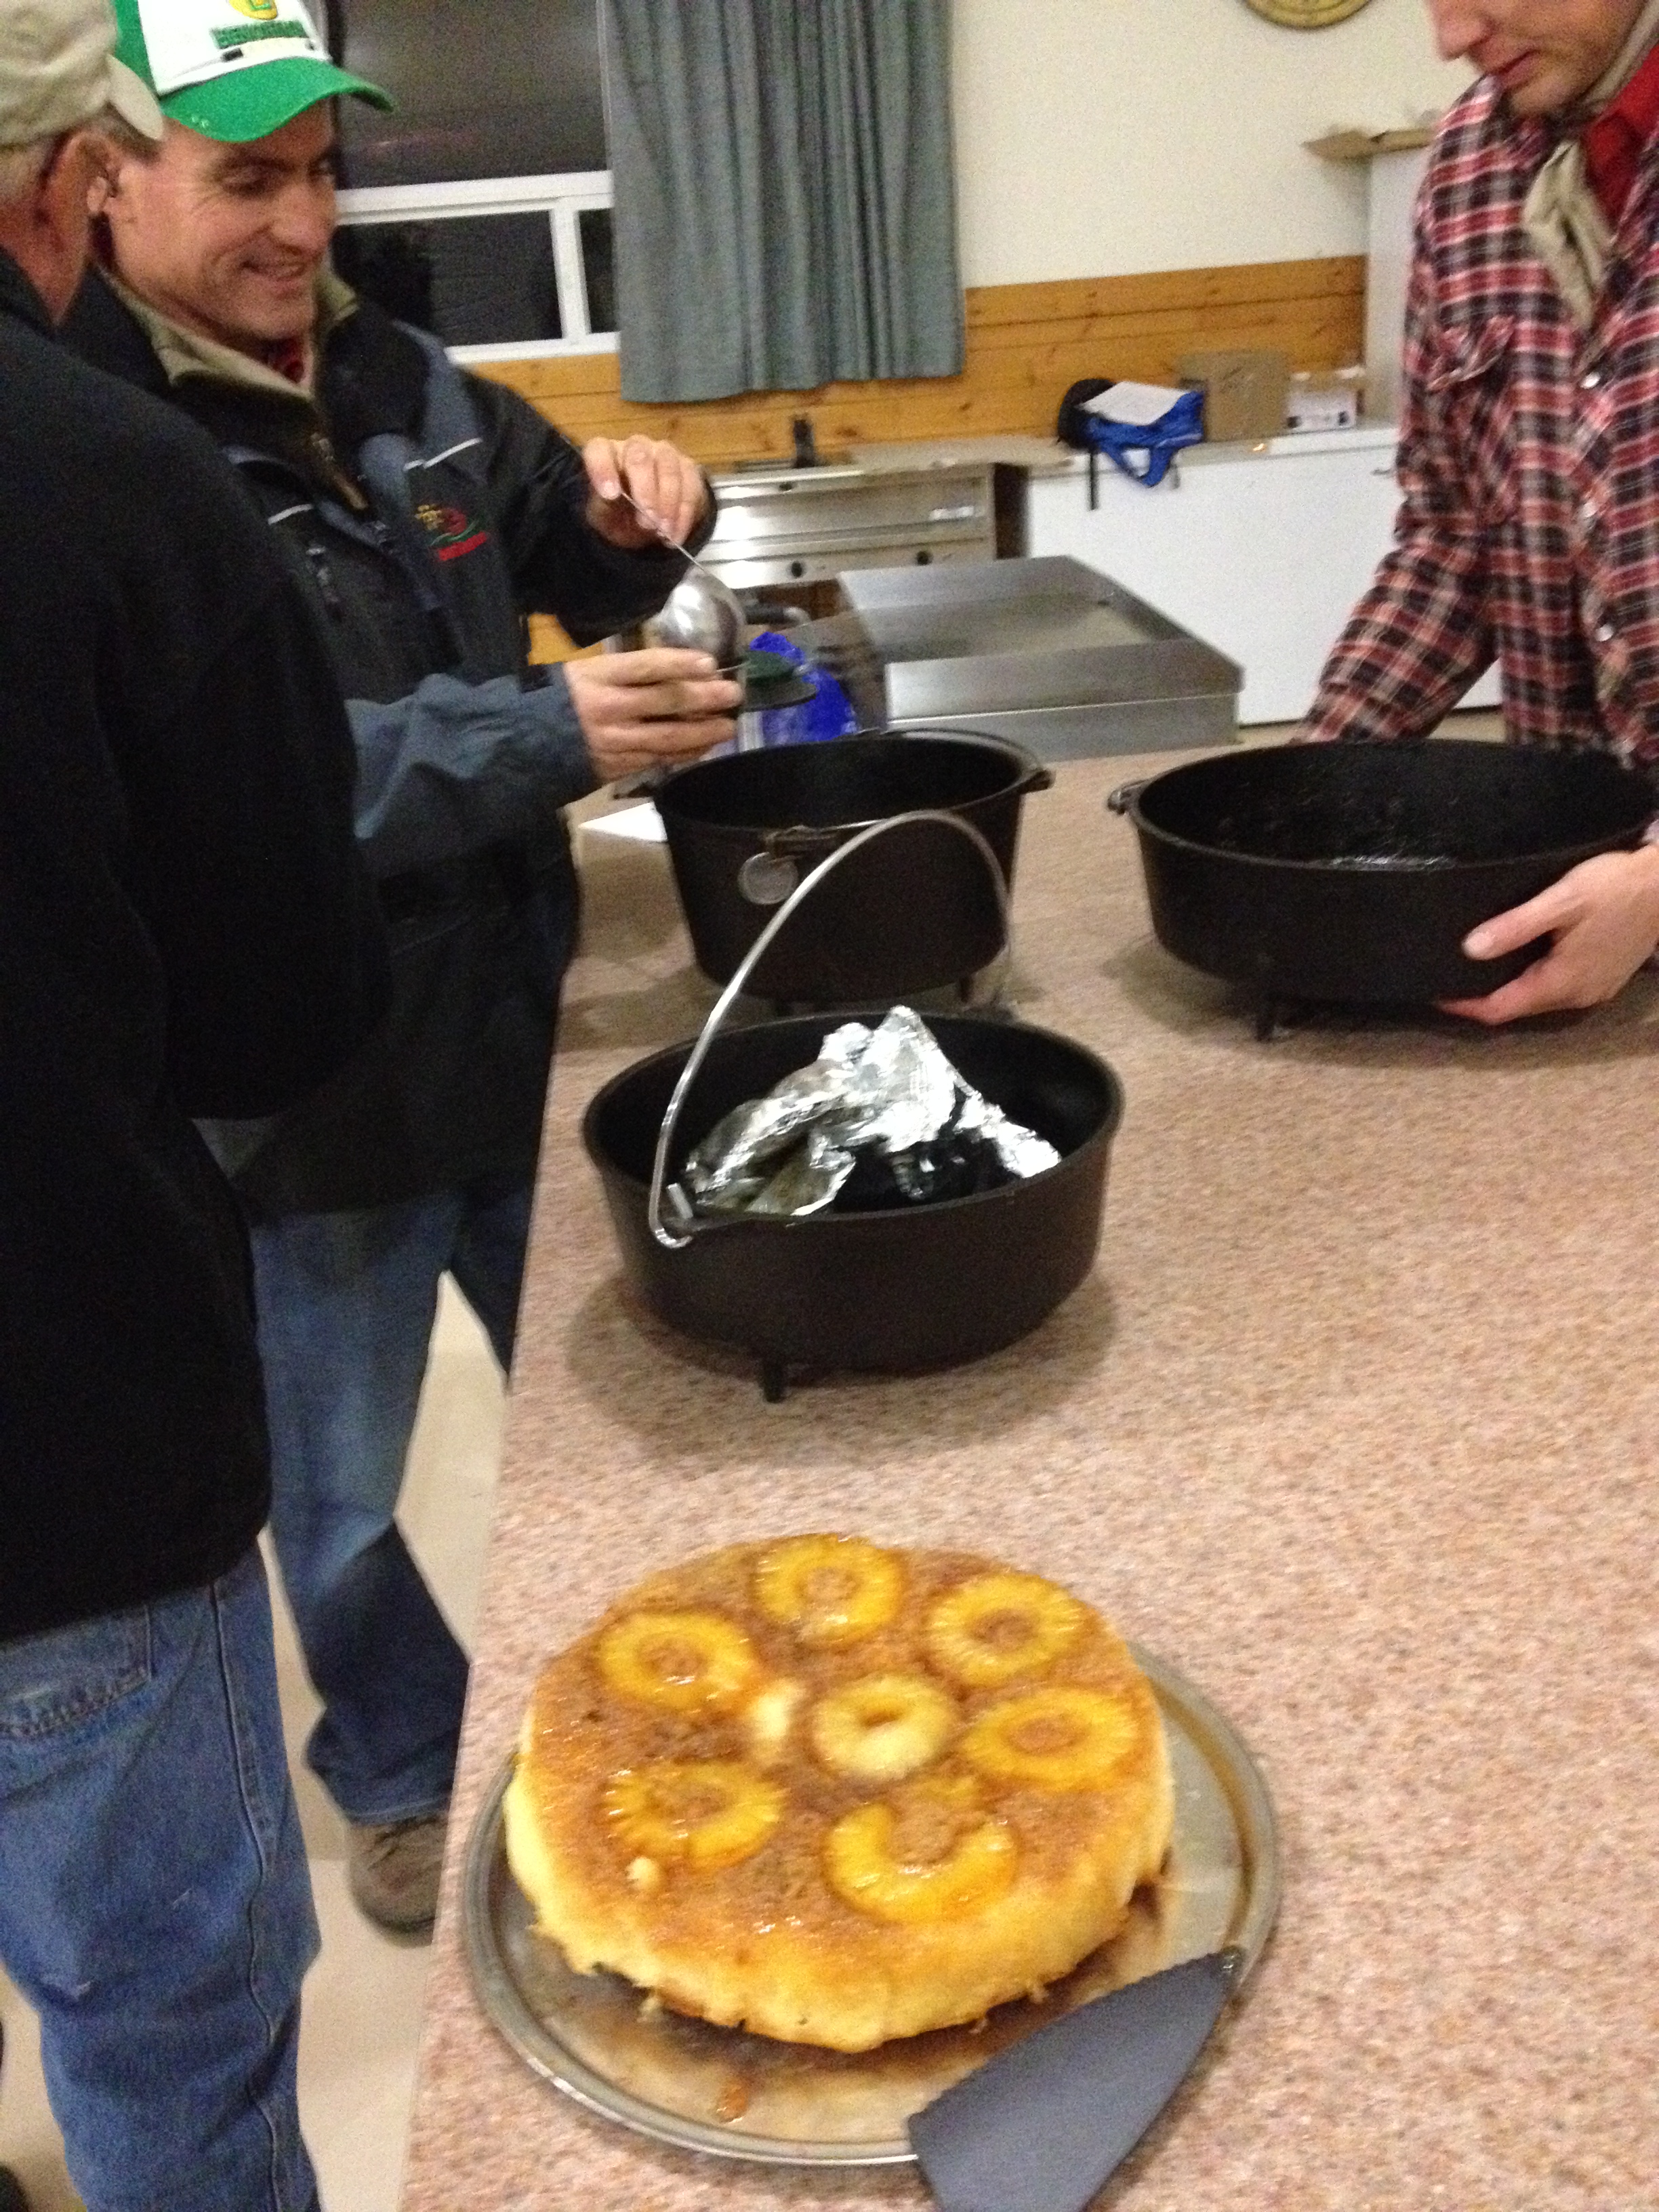 The awesome Pineapple upside down cake.
 |
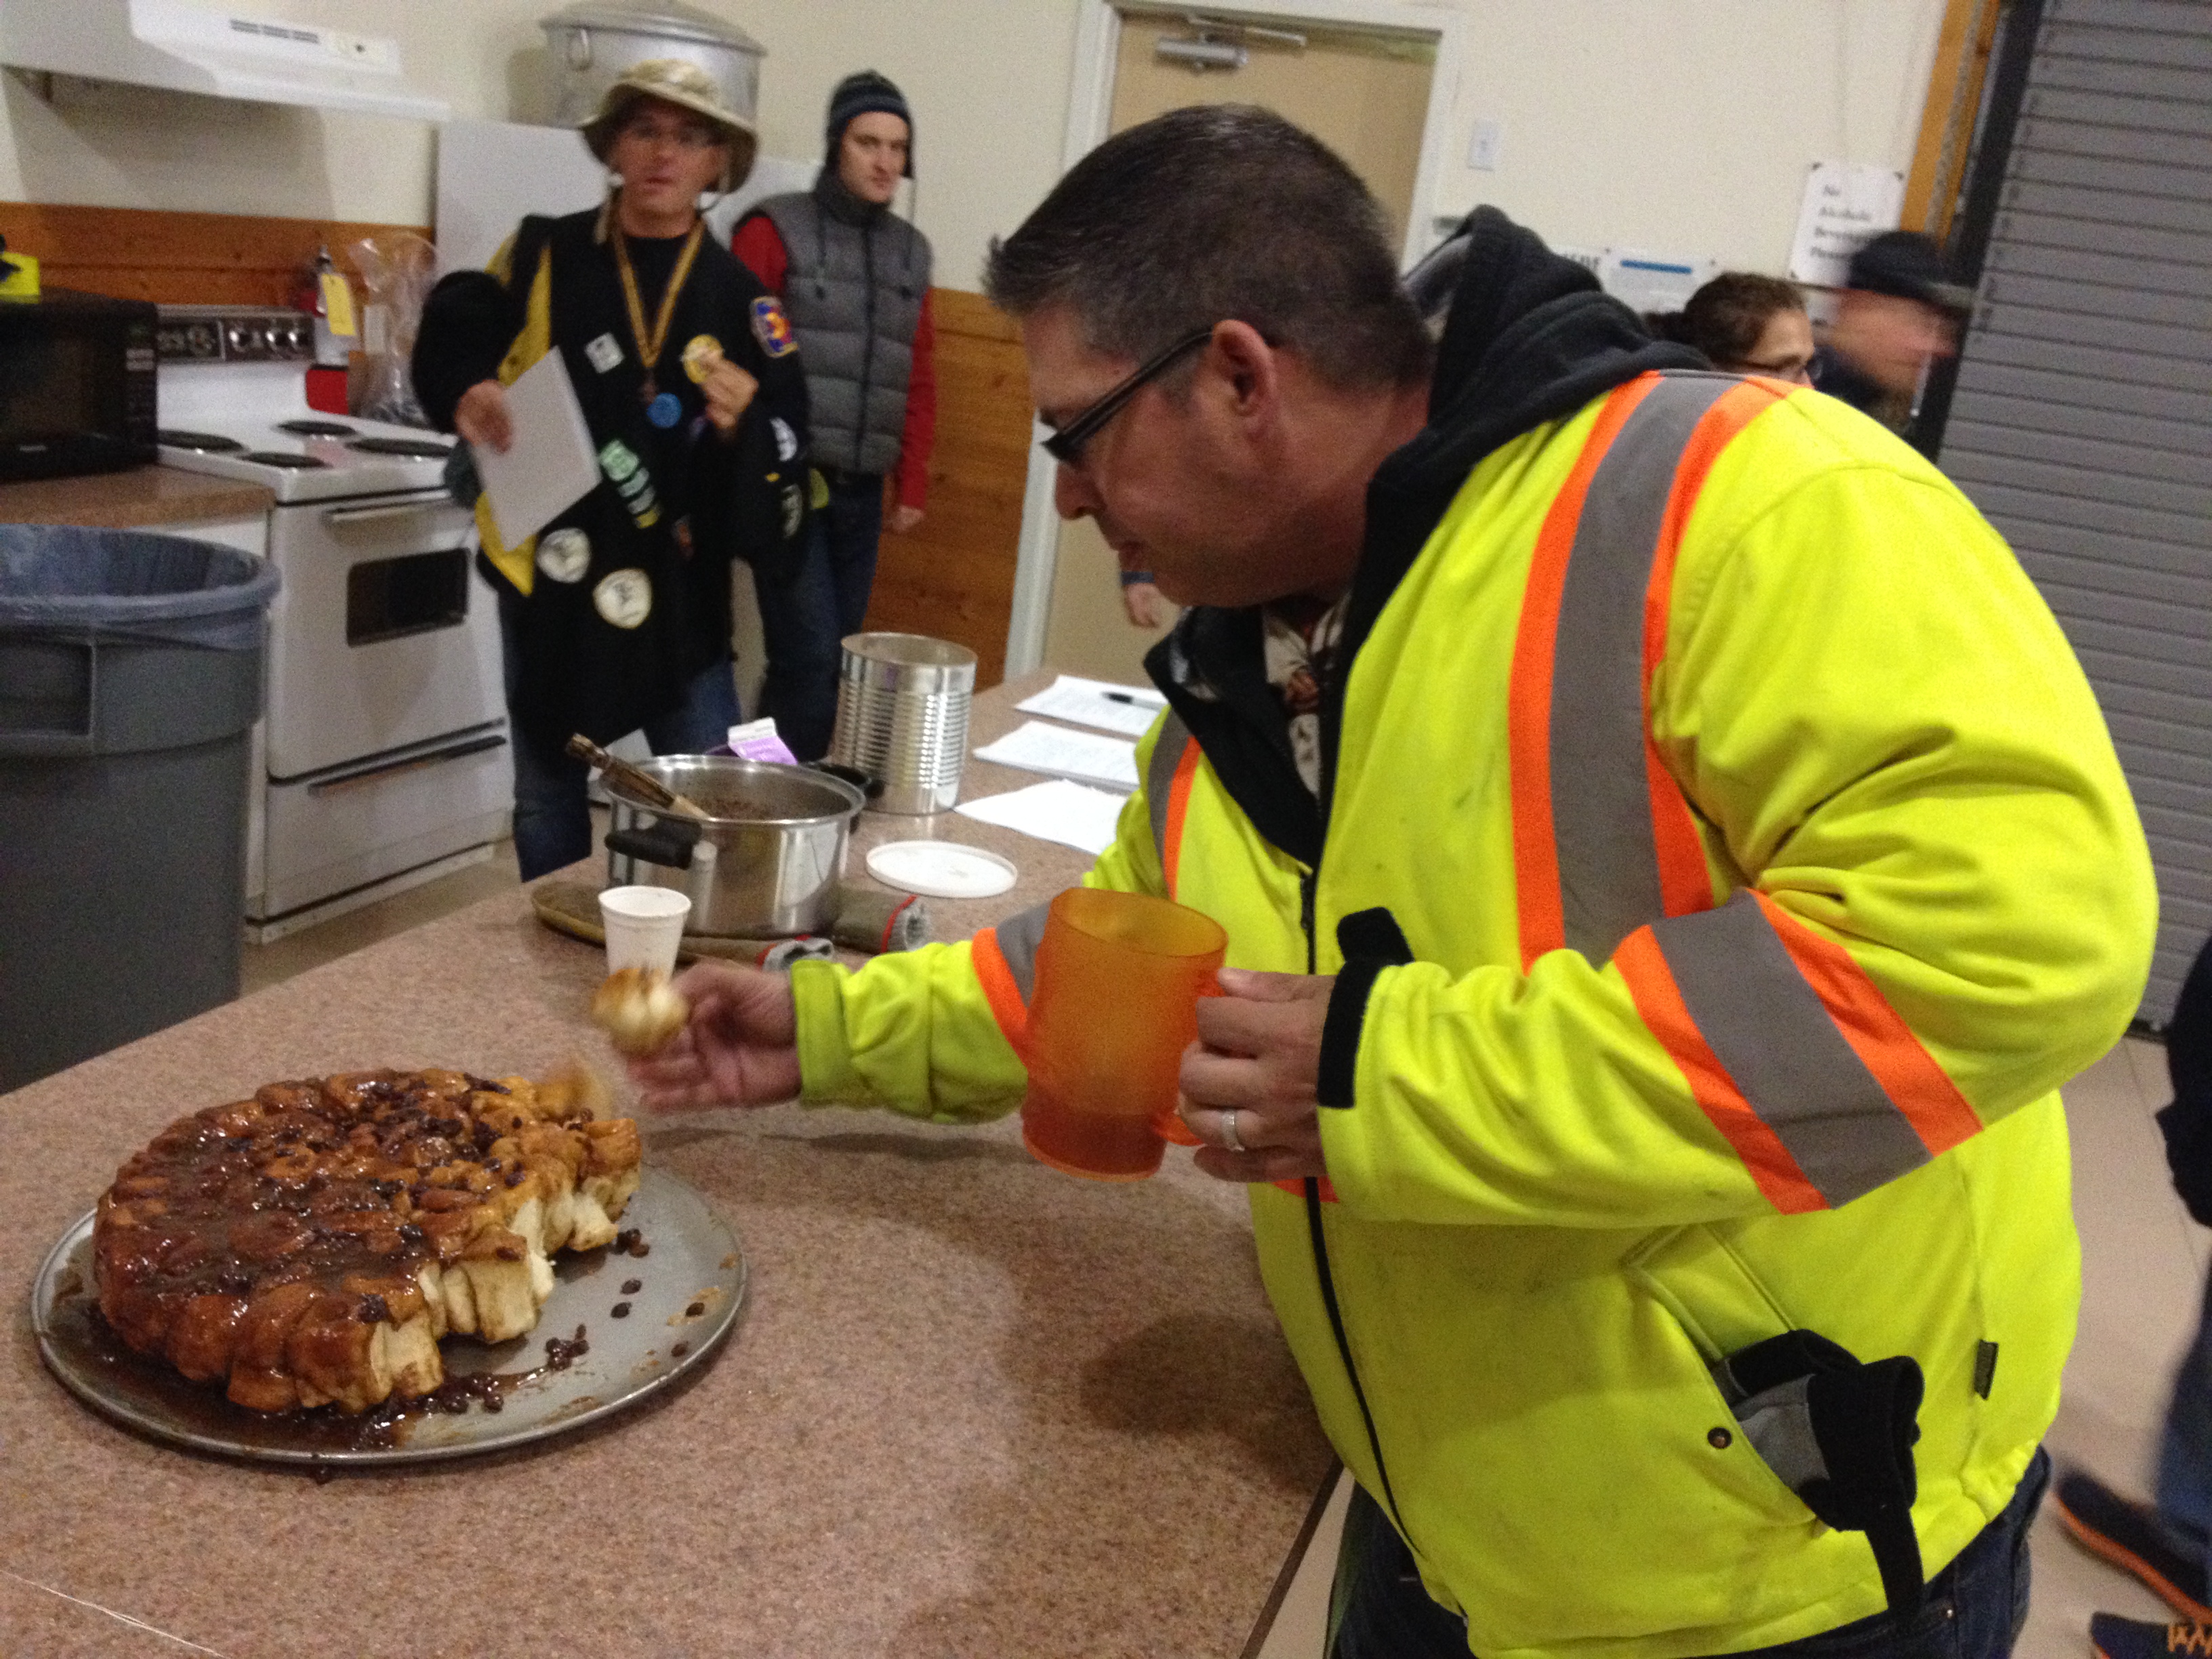 and then the "Piece de Resistance", Cinnamon Twists.
 |
 Starter kit for cinnamon twists. For a 350 degree oven it's 25 briquettes on
the lid and 12 under the pot. I think?
Starter kit for cinnamon twists. For a 350 degree oven it's 25 briquettes on
the lid and 12 under the pot. I think? |
 Cinnamon twists. Once the dough rises, pull it out of the Dutch oven. You
then lather with sugar, butter and cinnamon, then cut into short strips,
twist them and place bake into the Dutch oven to finish baking.
These were way amazing.
Cinnamon twists. Once the dough rises, pull it out of the Dutch oven. You
then lather with sugar, butter and cinnamon, then cut into short strips,
twist them and place bake into the Dutch oven to finish baking.
These were way amazing. |
 Hard not coming back for seconds on these babies.
 |
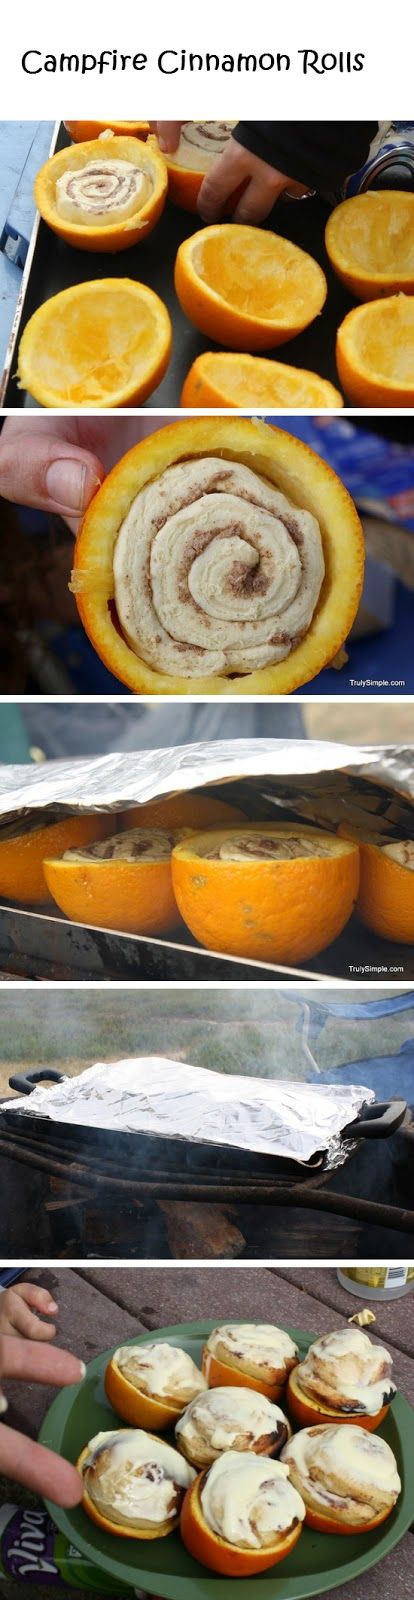 Jeremy
provided me with a useful link for developing the skill: DutchovenDude.com .
Jeremy
provided me with a useful link for developing the skill: DutchovenDude.com .I want to try these at the next campfire. |
| Closing Ceremony | |||
 Some additional awards
 |
 Even some of the trainers get awards...
 |
 Participants ready for Gillwell beads and scarf.
 |
 and you got to wrap it up with a camp song.
 |